
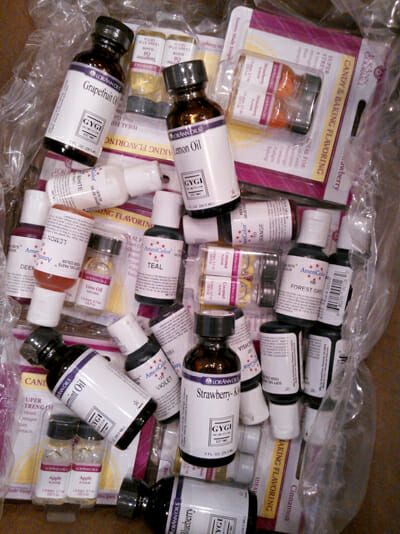
A few months ago we launched our new cook book with a big ol’ party at our favorite cooking store, Orson Gygi in Salt Lake City. Hundreds of you showed up to say hello, have some munchies, and celebrate with us. (Thank you!) It was seriously one of the best days ever. Since neither Kate nor I live in Salt Lake City, every time we do an event at Orson Gygi we stock up on goodies for ourselves. This past trip I spent a really long time in their aisle of colors and flavorings, partially just out of sheer awe at the selection. They have literally hundreds of flavors, half of which I never knew existed.
I sat there wanting to buy one of everything, but not even knowing what I would use them for. That’s when I remembered lastChristmas when my friend Cami borrowed some peppermint oil from me to make homemade gumdrops. She brought over a plate of the sparkled jewels when she was done and they were so fun to eat! I thought it would be the perfect thing to stock up on flavors and colors for so I grabbed a few at Orson Gygi that day. And then I ordered just a few more on-line. I have difficulty making decisions, okay?
This is the basic recipe you see all over the place for “Homemade Gumdrops” but I think that name is a bit misleading. These aren’t as chewy and sticky as a gumdrop, they’re more soft and jelly-like. Almost like (and I really hate to use this comparison, because they’re way better than this- I swear) a glorified Jell-O jiggler. But they’re delicious and sparkly and kind of addicting. My kids couldn’t keep their little fingers away from these, and they loved helping smell the flavors and pick color combos.
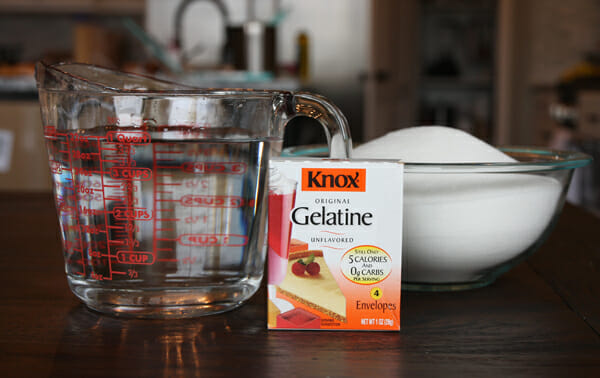
These take quite a bit of gelatin, you’ll need a couple of boxes at least. Keep in mind you’re buying unflavored gelatin (which is found near the baking supplies and Jell-O in the grocery store.) And yes, all of that sugar is going in. C’mon, it’s candy!
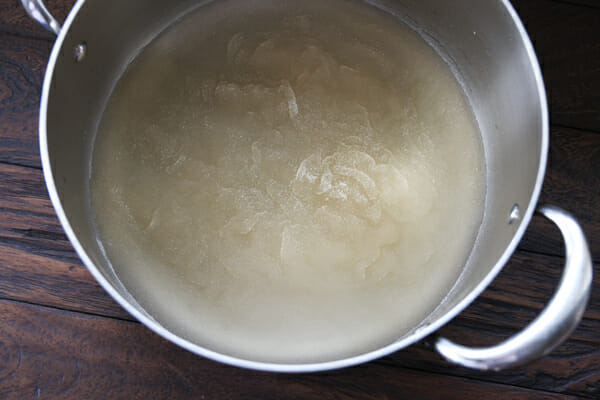
To use unflavored gelatin, you first soften it by sprinkling it over cold water. It will instantly take form as the granules of gelatin absorb the water.
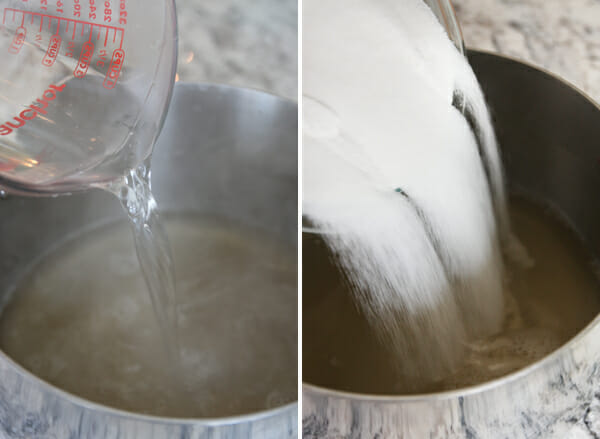
After it softens, add boiling water to dissolve it and you’ll have a liquid. Once the gelatin is mixed in and dissolved, add the sugar.
Bring this mixture to a boil on the stove-top. You’ll want to keep an eye on it, and like, maybe notturn it up crazy high because you’re too impatient to wait for it to come to a boil and then leave it like that while you go feed your kids Corn Pops for lunch and get distracted when said Corn Pops end up in a splat across your freshly mopped kitchen floor. If that happens, you might end up with sticky-scalding-jelly-sugar all over your brand new (and therefore pristinely clean) stove top.
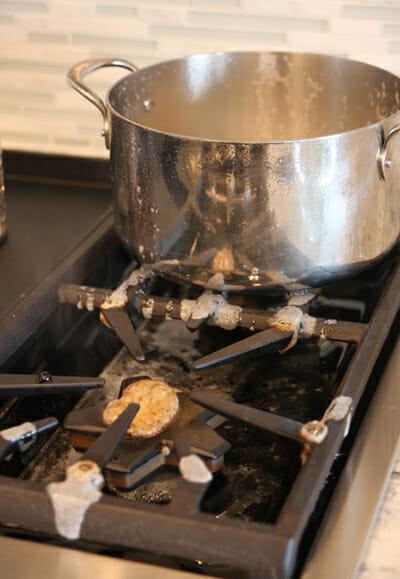
The stove-top that you ironically snapped a photo of just minutes before, simply because it was so pretty and so, so clean and the fact that it’s shaped like a star makes you smile.
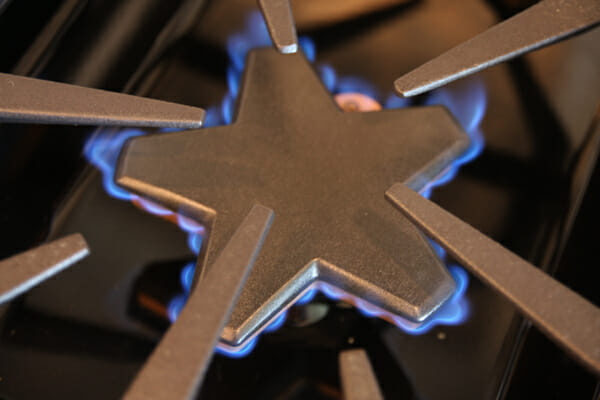
The same burner you then spent approximately 47 minutes cleaning.
Tips from a pro, folks.
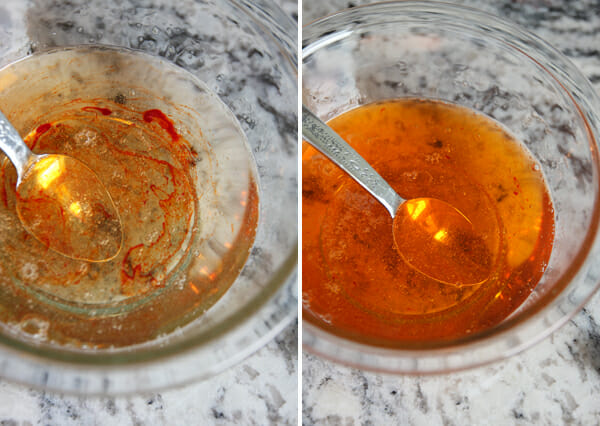
K, back to cooking. Once the mixture finishes boiling remove it from the heat. At this point, it’s pretty much done and you can color and flavor it. (I like that there are Christmas lights flickering in this photo!)
It will easily make 2 8×8 pans if you want to just to do two colors (like red and green). If you want to experiment with a variety of colors and flavors, you can use any containers. I used a bunch of little plastic rectangular food-storage containers and I found it easiest to line them with plastic wrap and spray the plastic wrap with non-stick spray. You can pour the sugar mixture directly into the containers first and then add colors and flavors, but I mixed small batches in a mixing bowls first and then poured them in.
Are you noticing the change in background in these photos? These are my pretty new counter tops in my new kitchen. I’ve gotten lots of requests to see photos of my new cooking space so as soon as I can get through Christmas I’ll take some photos of it to show you guys. I love, love, love how it all turned out.
If you’re experimenting with small batches in random-sized containers, a good trick is to use a measuring cup to measure how much water fills the container up about 1/2 inch so you know how much sugar mixture to color.
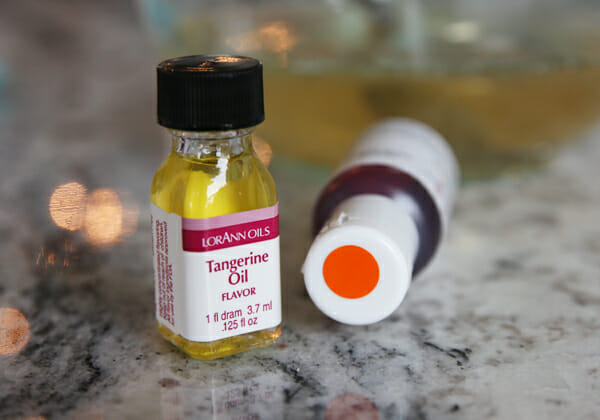
Add food coloring and flavoring as you like. I used oils and started with about 1/8 teaspoon per cup of sugar mixture, and increased to taste from there. I’m using oils, but regular extracts will work fine too. If you can find oil, they work particularly well in things like this because you don’t run the risk of having an alcohol-ish after taste from extract. The mixture should be cool enough to test by this point so you can go by taste.
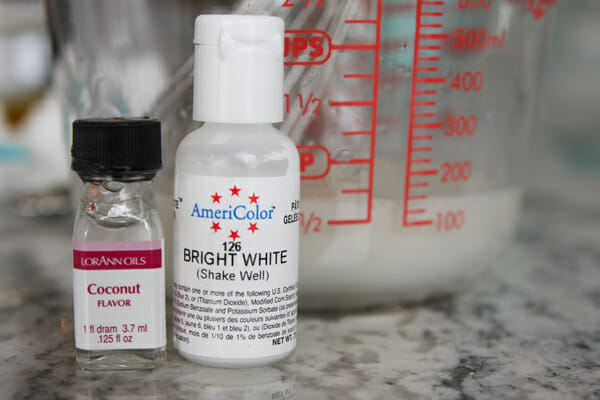
One of my favorites was coconut. Did you know they make white food coloring? I learned that fromBridget, who uses it to make her white icing bright white.
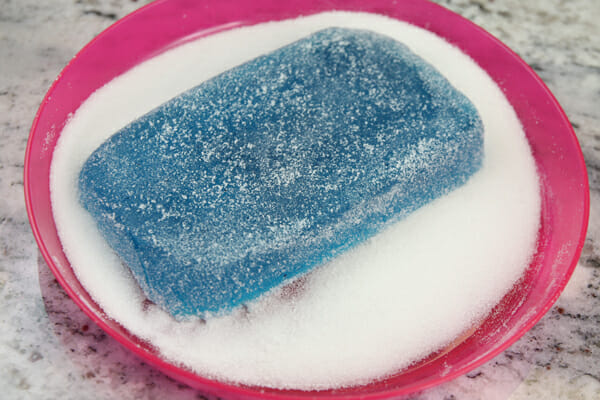
Once they’re in their containers or pans, chill them for at least 4 hours in the fridge. When they’re chilled and set, pull the mixture out by the plastic and peel off onto a cutting board that’s been sprinkled in sugar. Since I was making small batches, I placed them directly on a plate of sugar and turned to coat all sides.
Use a sharp knife (it might help to coat with cooking spray) to cut into cubes and roll the cubes in sugar. It helps to have a plate of sugar nearby to coat the sticky sides and make cutting easier. I also found we all liked these much better in smaller pieces, like 1/2 inch squares as opposed to 1 inch squares.

Leave the candies out at room temp for a day or two (overnight is fine) so the sugar can crystallize and form a crunchy exterior.

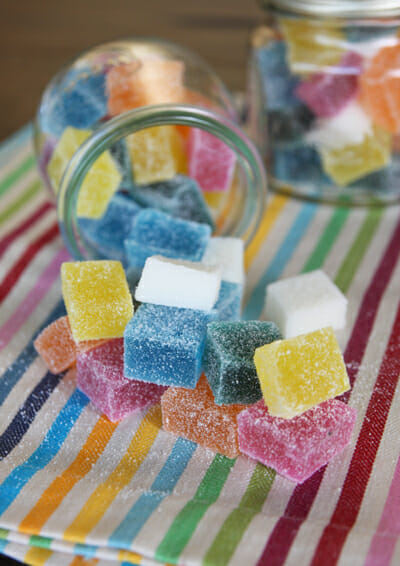
We did blue with blueberry, green with lime, lemon with yellow, tangerine with orange, strawberry-kiwi with pink, and coconut with white.

People are always asking us for goodies that pack and ship well- and these fit the bill!

I had excellent intentions of making a printable to go with these (Have a Holly-Jelly Christmas??) but I opted to take a nap today instead. Yes, really. So if anyone can think of a particularly catchy phrase for a printable I just might make one up for ya!
Print This!
Sparkly Fruit Gummies
Recipe slightly adapted from LHJ Magazine
6 tablespoons unflavored gelatin (about 8 envelopes*)
1 1/2 cups cold water
2 1/4 cups boiling water
6 cups sugar, plus extra for coating
Extract or flavored oil
Food coloring
*Measure out the gelatin in tablespoons, as it may be more than 8 envelopes. If you have a partial pack at 6 tablespoons, just add all of the partial pack.
1. Line 2 8-x-8-inch pans, or a variety of smaller rectangular containers with plastic wrap and spray with non-stick spray. Set aside. Sprinkle gelatin evenly over the cold water in a 6-quart pot. Let sit for 5 minutes, then add the boiling water and stir until gelatin dissolves. Stir in sugar.
2. Bring to a boil over medium-high heat and gently simmer for 25 minutes, stirring constantly. Remove from heat. At this point you may pour the mixture into the prepared pans and then add flavors and colors as desired, or carefully pour hot mixture into a mixing bowl in batches to color and flavor and then pour the mixture into the prepared pans. Cover finished containers with plastic and chill at least 4 hours or overnight.
3. Lift plastic from pans and peel off candy. Turn candy onto a cutting board that’s been sprinkled with sugar. Coat a sharp knife with cooking spray, then cut candy into 1/2-inch cubes. Roll in sugar.
4. Leave candies on parchment, foil, or waxed paper at room temperature for one to two days to allow the outside to crystallize. Store in an airtight container for up to 3 weeks.
PS: LAST DAY to enter our fantastic giveaway! Click here for the details!


(Edit: Lots of people have asked about the cute mason jar with the cut-out lid in the photo above. It’s from Orson Gygi, too!)
from: http://www.ourbestbites.com/2012/12/sparkly-fruit-gummies/
I sat there wanting to buy one of everything, but not even knowing what I would use them for. That’s when I remembered lastChristmas when my friend Cami borrowed some peppermint oil from me to make homemade gumdrops. She brought over a plate of the sparkled jewels when she was done and they were so fun to eat! I thought it would be the perfect thing to stock up on flavors and colors for so I grabbed a few at Orson Gygi that day. And then I ordered just a few more on-line. I have difficulty making decisions, okay?
This is the basic recipe you see all over the place for “Homemade Gumdrops” but I think that name is a bit misleading. These aren’t as chewy and sticky as a gumdrop, they’re more soft and jelly-like. Almost like (and I really hate to use this comparison, because they’re way better than this- I swear) a glorified Jell-O jiggler. But they’re delicious and sparkly and kind of addicting. My kids couldn’t keep their little fingers away from these, and they loved helping smell the flavors and pick color combos.
These take quite a bit of gelatin, you’ll need a couple of boxes at least. Keep in mind you’re buying unflavored gelatin (which is found near the baking supplies and Jell-O in the grocery store.) And yes, all of that sugar is going in. C’mon, it’s candy!
To use unflavored gelatin, you first soften it by sprinkling it over cold water. It will instantly take form as the granules of gelatin absorb the water.
After it softens, add boiling water to dissolve it and you’ll have a liquid. Once the gelatin is mixed in and dissolved, add the sugar.
Bring this mixture to a boil on the stove-top. You’ll want to keep an eye on it, and like, maybe notturn it up crazy high because you’re too impatient to wait for it to come to a boil and then leave it like that while you go feed your kids Corn Pops for lunch and get distracted when said Corn Pops end up in a splat across your freshly mopped kitchen floor. If that happens, you might end up with sticky-scalding-jelly-sugar all over your brand new (and therefore pristinely clean) stove top.
The stove-top that you ironically snapped a photo of just minutes before, simply because it was so pretty and so, so clean and the fact that it’s shaped like a star makes you smile.
The same burner you then spent approximately 47 minutes cleaning.
Tips from a pro, folks.
K, back to cooking. Once the mixture finishes boiling remove it from the heat. At this point, it’s pretty much done and you can color and flavor it. (I like that there are Christmas lights flickering in this photo!)
It will easily make 2 8×8 pans if you want to just to do two colors (like red and green). If you want to experiment with a variety of colors and flavors, you can use any containers. I used a bunch of little plastic rectangular food-storage containers and I found it easiest to line them with plastic wrap and spray the plastic wrap with non-stick spray. You can pour the sugar mixture directly into the containers first and then add colors and flavors, but I mixed small batches in a mixing bowls first and then poured them in.
Are you noticing the change in background in these photos? These are my pretty new counter tops in my new kitchen. I’ve gotten lots of requests to see photos of my new cooking space so as soon as I can get through Christmas I’ll take some photos of it to show you guys. I love, love, love how it all turned out.
If you’re experimenting with small batches in random-sized containers, a good trick is to use a measuring cup to measure how much water fills the container up about 1/2 inch so you know how much sugar mixture to color.
Add food coloring and flavoring as you like. I used oils and started with about 1/8 teaspoon per cup of sugar mixture, and increased to taste from there. I’m using oils, but regular extracts will work fine too. If you can find oil, they work particularly well in things like this because you don’t run the risk of having an alcohol-ish after taste from extract. The mixture should be cool enough to test by this point so you can go by taste.
One of my favorites was coconut. Did you know they make white food coloring? I learned that fromBridget, who uses it to make her white icing bright white.
Once they’re in their containers or pans, chill them for at least 4 hours in the fridge. When they’re chilled and set, pull the mixture out by the plastic and peel off onto a cutting board that’s been sprinkled in sugar. Since I was making small batches, I placed them directly on a plate of sugar and turned to coat all sides.
Use a sharp knife (it might help to coat with cooking spray) to cut into cubes and roll the cubes in sugar. It helps to have a plate of sugar nearby to coat the sticky sides and make cutting easier. I also found we all liked these much better in smaller pieces, like 1/2 inch squares as opposed to 1 inch squares.
Leave the candies out at room temp for a day or two (overnight is fine) so the sugar can crystallize and form a crunchy exterior.
We did blue with blueberry, green with lime, lemon with yellow, tangerine with orange, strawberry-kiwi with pink, and coconut with white.
People are always asking us for goodies that pack and ship well- and these fit the bill!
I had excellent intentions of making a printable to go with these (Have a Holly-Jelly Christmas??) but I opted to take a nap today instead. Yes, really. So if anyone can think of a particularly catchy phrase for a printable I just might make one up for ya!
Print This!
Sparkly Fruit Gummies
Recipe slightly adapted from LHJ Magazine
6 tablespoons unflavored gelatin (about 8 envelopes*)
1 1/2 cups cold water
2 1/4 cups boiling water
6 cups sugar, plus extra for coating
Extract or flavored oil
Food coloring
*Measure out the gelatin in tablespoons, as it may be more than 8 envelopes. If you have a partial pack at 6 tablespoons, just add all of the partial pack.
1. Line 2 8-x-8-inch pans, or a variety of smaller rectangular containers with plastic wrap and spray with non-stick spray. Set aside. Sprinkle gelatin evenly over the cold water in a 6-quart pot. Let sit for 5 minutes, then add the boiling water and stir until gelatin dissolves. Stir in sugar.
2. Bring to a boil over medium-high heat and gently simmer for 25 minutes, stirring constantly. Remove from heat. At this point you may pour the mixture into the prepared pans and then add flavors and colors as desired, or carefully pour hot mixture into a mixing bowl in batches to color and flavor and then pour the mixture into the prepared pans. Cover finished containers with plastic and chill at least 4 hours or overnight.
3. Lift plastic from pans and peel off candy. Turn candy onto a cutting board that’s been sprinkled with sugar. Coat a sharp knife with cooking spray, then cut candy into 1/2-inch cubes. Roll in sugar.
4. Leave candies on parchment, foil, or waxed paper at room temperature for one to two days to allow the outside to crystallize. Store in an airtight container for up to 3 weeks.
PS: LAST DAY to enter our fantastic giveaway! Click here for the details!

(Edit: Lots of people have asked about the cute mason jar with the cut-out lid in the photo above. It’s from Orson Gygi, too!)
from: http://www.ourbestbites.com/2012/12/sparkly-fruit-gummies/
No comments:
Post a Comment