The Intersection of Design & Motherhood
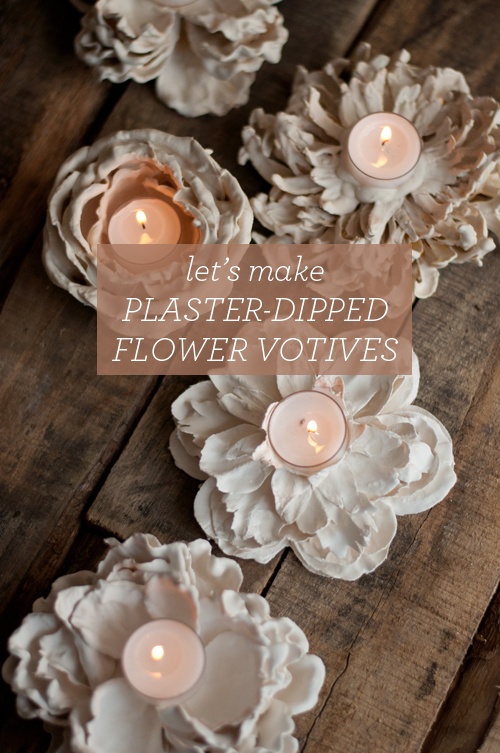
Plaster Flower Votives
Images and text by Amy Christie for Design Mom.
I’ve been loving all the plaster dipped flowers across the web. They have such an ethereal and dreamlike look to them. Building on the process, I took it a step further and turned the plaster-ed flowers into votives. Dainty and functional.
Plaster is a fun medium to work in. A liquid become a solid in a few short minutes and you get to decide how to form it. For dipping, the plaster coats the petals, freezing them in creamy white loveliness. With the stamina of the plastic flower, the votives appear fragile but aren’t so.
(If you haven’t noticed, I love working with plaster — as seen in these posts: gold leaf votives, leaf napkin rings, quote votives.)
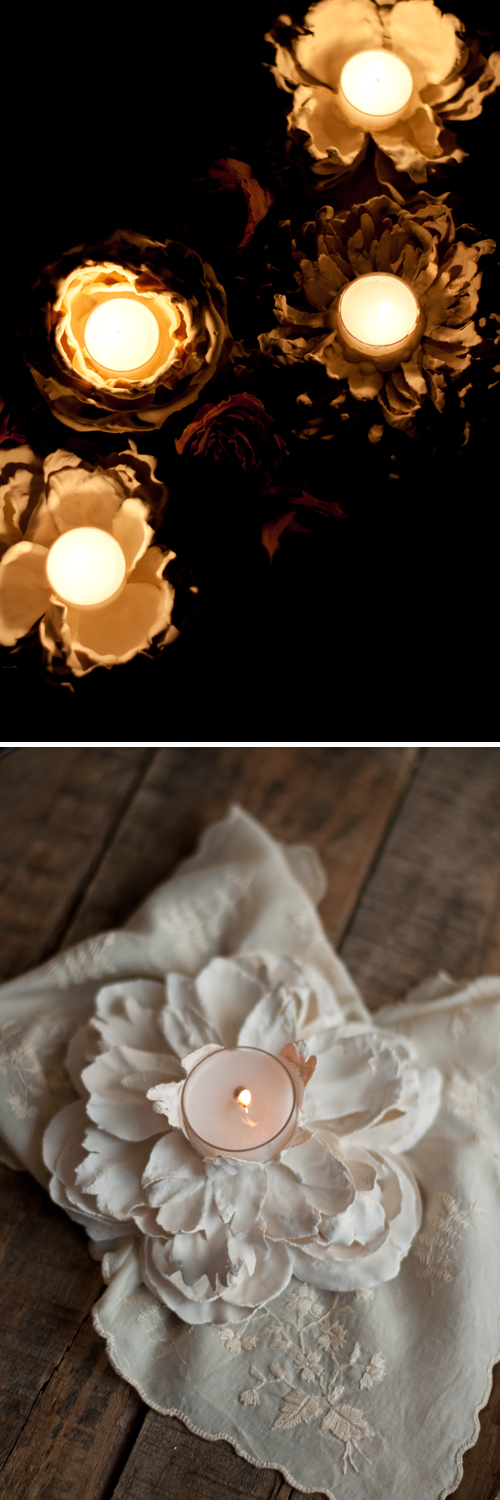
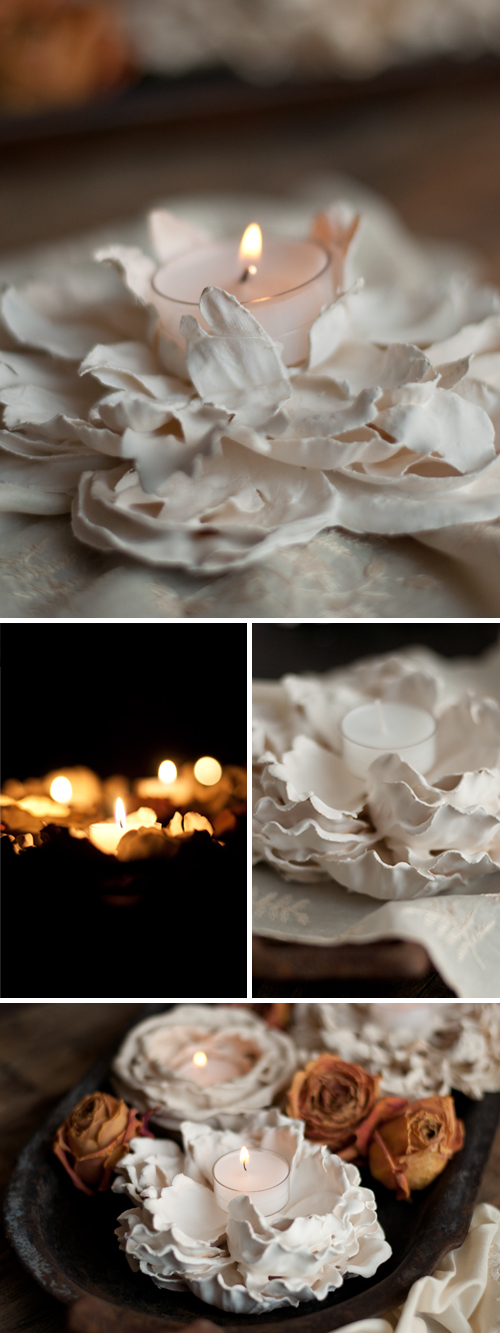
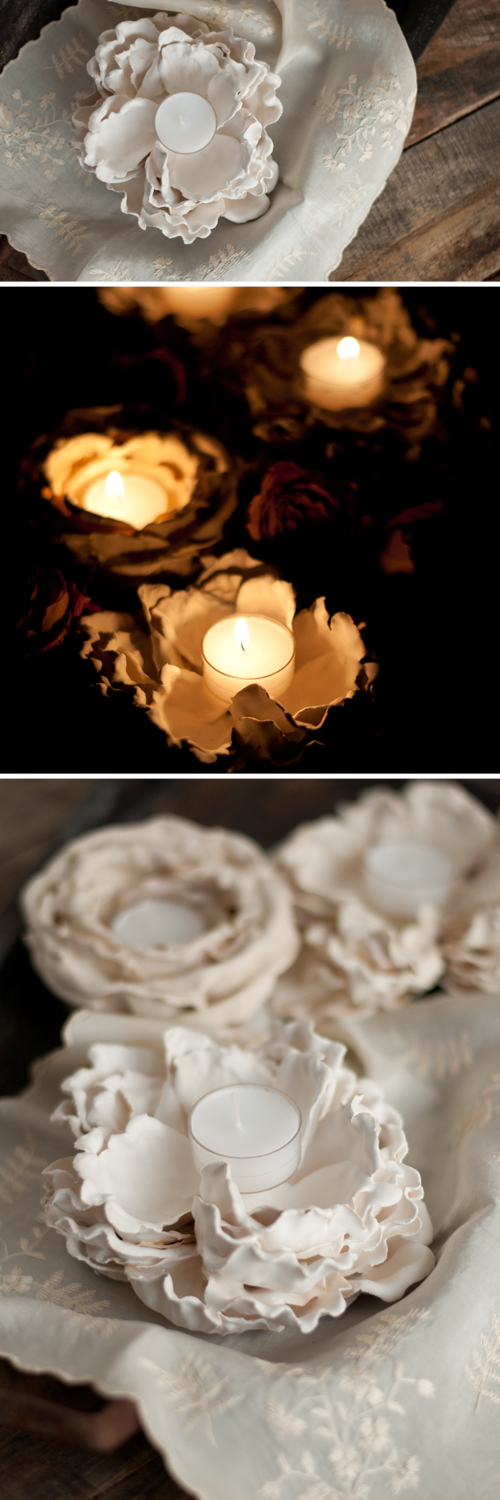
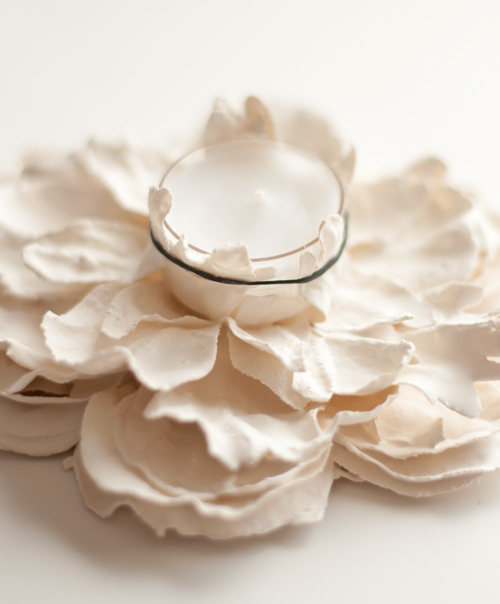
The coated flowers are still ethereal and dreamlike and now, with the addition of a candle, rather romantic. Gather a few for a shelf in a living room, or on a bedroom mantle.
I think a collection of these would make a gorgeous centerpiece for a dinner party — or even as wedding decor!
Ready to get a little bit messy?
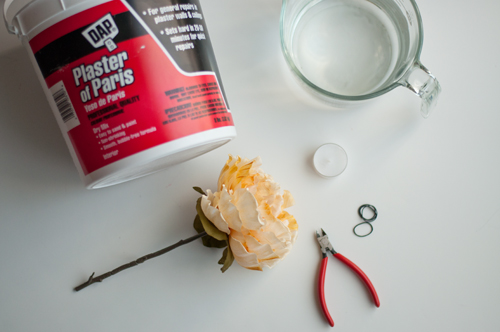
Supplies:
-faux flowers
-plaster
-water
-bucket to mix – best shape is something that is more tall than wide
-wax paper or non-porous surface to lay dipped flowers on
-votive for sizing
-small rubber bands
-metal clippers
-small bit of glue – hot glue works great!
-tint* – optional
-plaster
-water
-bucket to mix – best shape is something that is more tall than wide
-wax paper or non-porous surface to lay dipped flowers on
-votive for sizing
-small rubber bands
-metal clippers
-small bit of glue – hot glue works great!
-tint* – optional
*You can tint plaster in a variety of ways, all with differing results. One option is to purchase tints made specifically for plaster, found with a simple internet search. I’ve tried food coloring, liquid watercolors and fabric dye powder. I got some color draining and settling with the food coloring and liquid watercolors. For me, the fabric dye gave the most consistent of color with minimal color spotting.
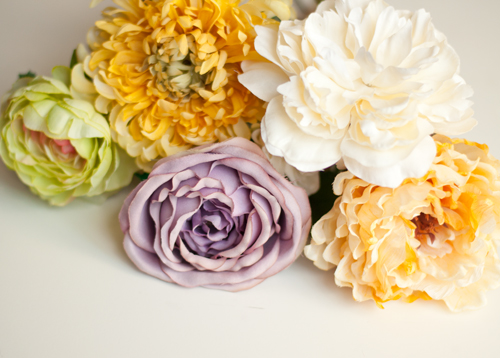
A word on the faux flowers. Just about any kind will do. Some of the stems I chose were the $1.99 variety, a couple were $6.99. Keep in mind that plaster will weigh down and flatten all but the very stiffest of flowers. I got the best results on flowers with larger, stiffer petals. The softer, ‘fragile’ petals just clumped together in the plaster, creating a blob of plaster.
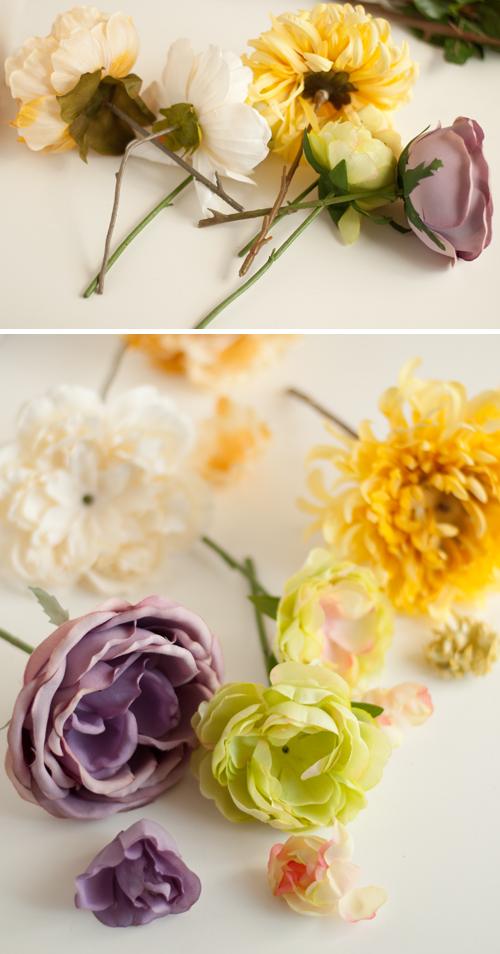
Prep the flowers. Pull the leaves off the stem and pluck out the center (I even cut down the stem. They are so looooong!). The amount that you remove from the center is up to you. To decide, I used a votive to ‘measure’ adequate space.
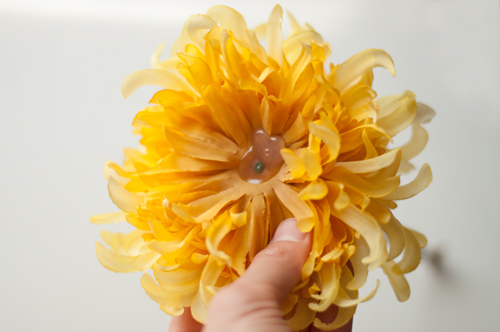
Most of the time the center is the part that keeps the flower and its petals together. Once you remove the center, add a little glue to keep the pieces together while dipping.
Once the flowers are ready, prep all the plaster items. Because the window of time for useable plaster is rather short, it’s best to get the water, plaster and optional tints set out with all the prepped flowers and then put it all together. Follow the manufacturer’s directions to mix the plaster.
Note: I found it easier and got better results with plaster that had a titch more water than recommended in the package directions. Not a measurable amount more, just a splash or two. It made the plaster more liquidy and it covered the flower better.
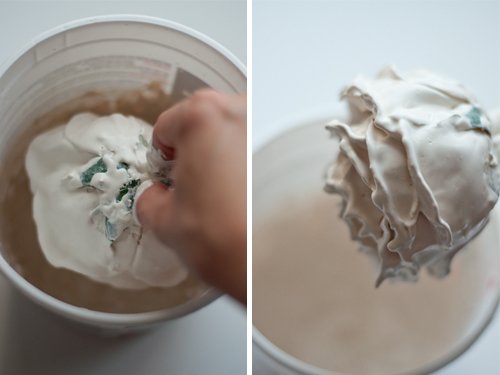
Now for the dipping. Your hands are going to get messy. Immerse the entire head of the flower in the plaster, quickly coating every part. Press the flower in the plaster, turning it often to make sure to get it in the layers, all the way to the center by the stem. Remove the excess plaster by gently but briskly shake the flower head by the stem. Do this inside the dipping container because the plaster will fly everywhere!
After a little shaking, check on the look of flower head. If it needs more plaster in some places or needs a better coat, dip it again. Then shake it. Keep dipping and shaking until you are happy with the look. Again, you will have to move quickly, especially if you are doing more than one flower.
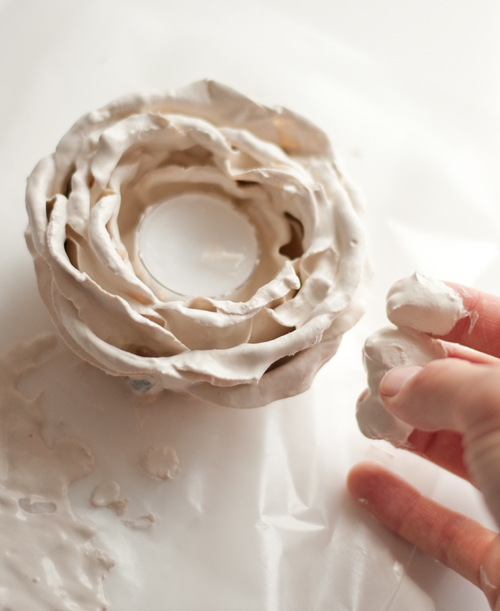
When the flower is finished, pluck or cut the flower head from its stem. Place it with the petals up to get a flat base. I added the votive right then to make sure there was adequate space for it before the flower set. If you find parts not covered in plaster or clumps, use your fingers to either apply or remove plaster.
I used small rubber bands to sculpt the petals on a few flowers.


Allow to fully dry and then add a lit votive candle.
Gorgeous!
P.S. — Like to make things? Click here for lots of fantastic projects.


