Friday, June 28, 2013

Pina Colada Cake

2011 Utah State Fair Winner: Pina Colada Cakehttp://www.abountifulkitchen.com/2011/10/2011-utah-state-fair-winner-pina-colada.html


This recipe won the "King Arthur Flour Great Cake Contest" in the Utah State Fair last month. 
I made it last weekend. It was absolutely delicious! Coconut cake is one of my favorites. Combine it with pineapple filling? Oh goodness. I'm still thinking about it. We loved it. I know you will too. 


Pina Colada Cake
Lisa Blodgett

Cake:
2 cups King Arthur all-purpose flour, sifted
1 tablespoon baking powder
1 teaspoon salt
1/2 cup unsalted butter, room temperature
2 cups sugar
1 1/4 cups coconut milk
1 1/2 teaspoons coconut extract
5 egg whites
Mix flour, baking powder and salt together in a bowl and set aside. Place the butter in a mixing bowl and beat on medium speed with a mixer for 1 minute. Add sugar and beat for another minute. Add coconut milk and coconut extract to butter mixture. Gradually add flour mixture into the butter mixture and beat for 2 minutes. In another bowl, beat egg whites until stiff peaks form. Fold the egg whites into the batter and mix until all ingredients are incorporated. Grease and line two 8-inch cake pans and divide batter evenly between them. Bake in a 350 degree preheated oven for 23-28 minutes until a toothpick inserted in the center of the cake comes out clean. Remove the pans from the oven and place on a cooling rack for 5-10 minutes to cool before removing cake from the pans.
Pineapple Filling:
1 20-ounce can crushed pineapple
2/3 cup sugar
2 tablespoons cornstarch
In a saucepan combine all ingredients over medium heat. Cook, stirring frequently until mixture gets a glossy look. Set aside to cool.
Frosting:
1 8-ounce package cream cheese, softened
2 tablespoons coconut milk
2 cups powdered sugar
1 teaspoon coconut extract
1 16-ounce container whipped topping, or 1 1/2 cups heavy whipping cream, whipped
Beat cream cheese in a bowl until smooth. Add coconut milk, powdered sugar and coconut extract. Mix well and then fold the whipped topping or cream into the mixture.
To assemble, cut both cakes open, making four 8-inch rounds. On top of one, place half the pineapple filling and top with a cake layer. Next add a layer of frosting, then a cake layer. Place remaining pineapple mixture on the cake and top with the last cake layer. Frost the sides and top of the cake. Sprinkle with coconut.
This is best when refrigerated for at least four hours.

Thursday, June 27, 2013

Homemade Watercolors

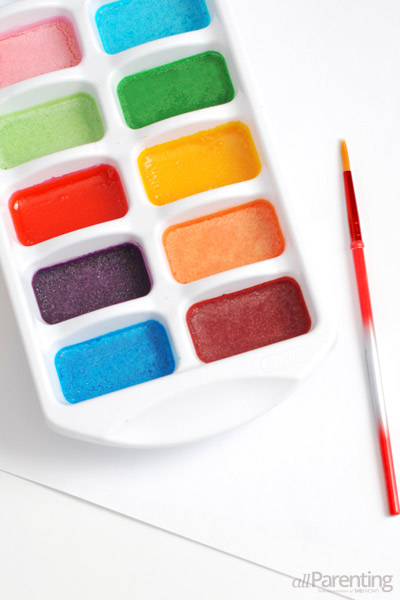
Found this great idea from allParenting.  I really like my kids to have a vast variety of mediums for art, so when I found this idea of making my own watercolors - I jumped on it!  What a great idea and most of these ingredients you probably already have laying around the house.


They say that those craft paints for kids are non-toxic, but it's still a mystery what's actually in them. Give yourself some peace of mind and the kids something fun to play with by making your own homemade water color paints!
Your kids will love getting to paint with watercolors that you made right at home! Kids can mix and match to make their paints in any color they can imagine, while Mom and Dad can rest easy knowing these paints are made from ingredients straight out of the pantry!
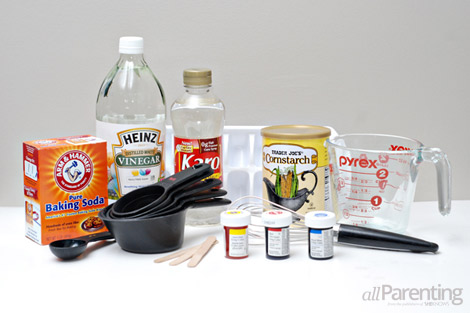
homemade water colors materials

What you'll need

  • Baking soda
  • Vinegar
  • Cornstarch
  • Corn syrup
  • Spouted mixing bowl
  • Measuring cups
  • Whisk
  • Food coloring
  • Ice cube tray

What you'll do

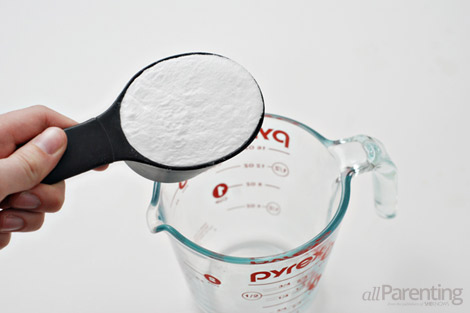
homemade water colors step 1
Measure out 1 cup of baking soda and pour it into the mixing bowl.
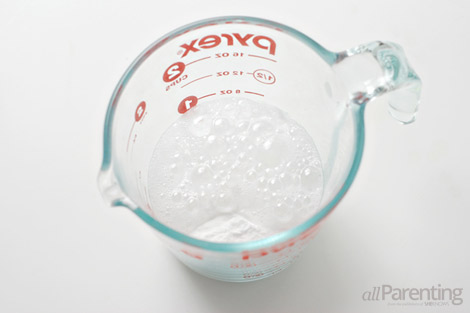
homemade water colors step 2
Very slowly pour 3/4 cup of vinegar into the bowl. Don't add it all at once or it may bubble over. Kids love watching and helping with this step!
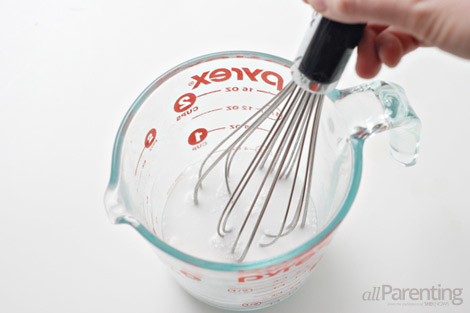
homemade water colors step 3
Once the vinegar and baking soda mixture has stopped bubbling, use the whisk to mix the two ingredients together.
homemade water colors step 4
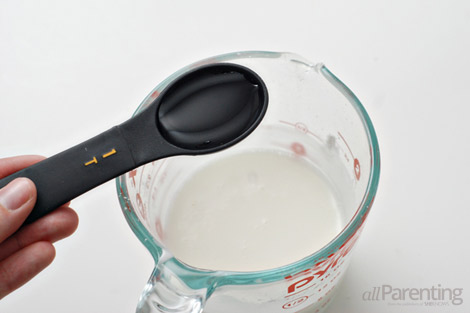
Measure out and add 2 tablespoons of corn syrup to the mix.
homemade water colors step 5
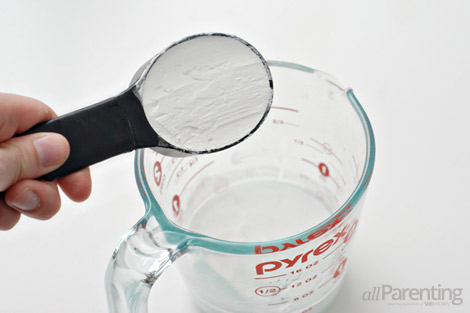
Next, add in 1 cup of cornstarch.
homemade water colors step 6
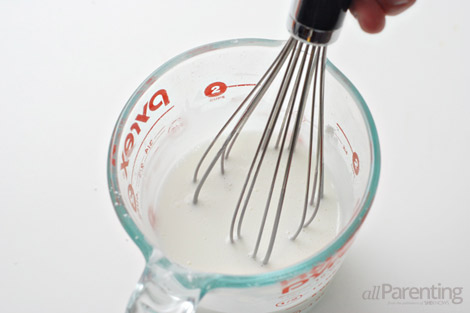
Whisk the entire mixture until it is well combined.
homemade water colors step 7
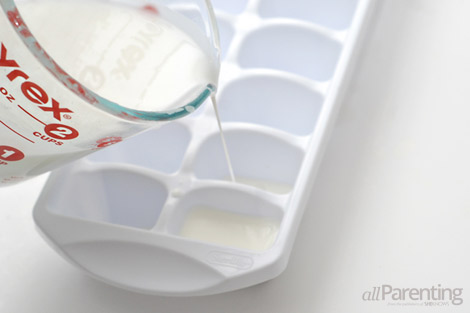
Using the pour spout, pour the mixture into the compartments of an ice cube tray.
homemade water colors step 8
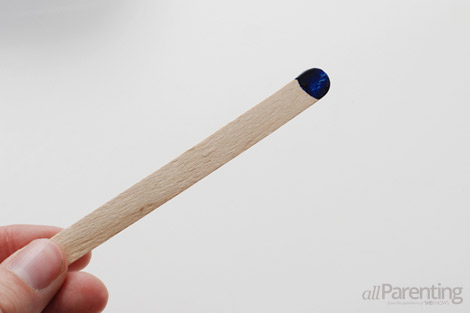
Put a small amount of food coloring on the tip of a popsicle stick.
homemade water colors step 9
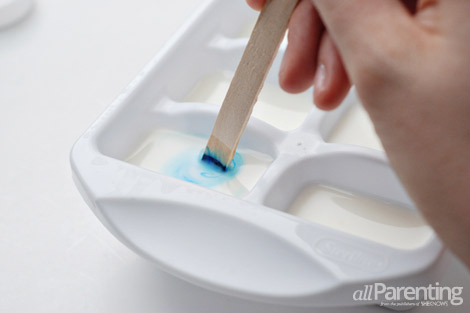
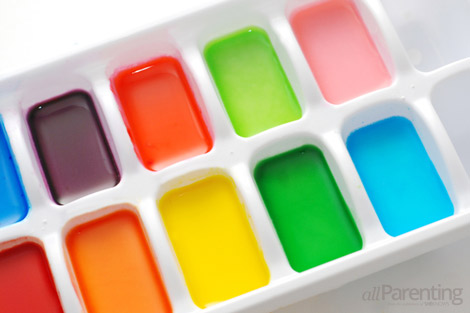
Use the popsicle stick to mix a different color of food coloring into each tray. Don't forget you can combine colors: red and blue will make purple, yellow and blue will make green, and red and yellow will make orange.
homemade water colors step 10
Once your water colors are mixed, set them in a safe spot to dry. Plan on allowing them to dry overnight, but it can take as long as 2 days before they are completely dry and ready to use.
homemade water colors step 11
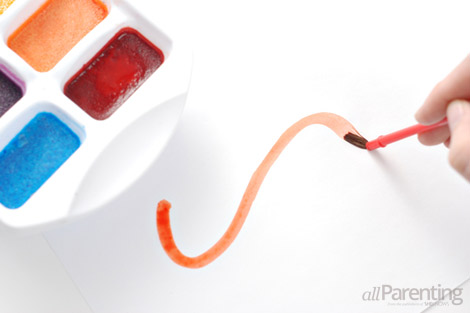
Once your water colors have dried, they are ready to use just like the paint from the store, but without the mystery ingredients!
allParenting homemade water colors

Wednesday, June 26, 2013

Turn Your Recipe's into Towels

I came across this idea from Spoonflower and am sooooo amazed.  Do you have any precious recipes handwritten from Mom or Granma.  This is such a great way to both preserve and use these recipes again and again.  Simply take a picture or scan them into your computer, use a little photoshop, and upload them to a special store that will print them out on beautiful canvas for you!  Here's the how to in more detail:

7447967210_a0e2326532_z
For a woman who keeps a newspaper from the day she was born, my mum has surprisingly few keepsakes or handwritten memorabilia from her own mother who passed away in 1999. When I asked her to trawl through her old papers and files, she managed to find three handwritten recipes from my grandmother. They appear to be the only remaining examples of her handwriting left in the world, and they are therefore as precious as they are priceless.
7447964784_c9770f7959_z
I decided to use these recipes to make a set of dish towels for my mum and I. This way, the handwritten originals can be safely stored away yet the joy of being able to see my grandmother’s handwriting in an everyday context will continue to make us smile and feel close to her.
Spoonflower’s linen-cotton canvas is the perfect fabric for dish towels. Linen is known for it’s super absorbent qualities, and with a 54” wide printable area, they are perfectly sized to fit a set of four dish towels on to one yard.
I began by taking photos of each recipe page, saving them to my computer and opening them in Picasa. The originals were old and yellowing with discoloration in some areas, but by using some of Picasa’s edit tools -- specifically the ‘retouch’ option (to minimize some of the blotchy discoloration) -- I was able to get a cleaner appearance to each page.
I then turned each recipe into a landscape orientation.
7447965120_bd95ab3e2c_z
After selecting all three images (I only had three recipes, so two of my recipe dish towels are identical), I selected the ‘Picture Collage’ option under the ‘Create’ tab. Picasa automatically places the images into a collage arrangement, that you are able to edit and move as you please. I added a grid spacing in between each image so that I would have a convenient cutting line, and by making the grid lines a color, I had an eye-catching feature for the back, hemmed edge of the finished dish towels.
7447945412_7f36bca15e_z
Under the ‘Page Format’ option, I set the size of the collage to 54” x 36”, which will fit exactly on to one yard of the linen-cotton canvas and uploaded the design to Spoonflower.
I always recommend ordering test swatches before committing to ordering the actual yardage, that way you are able to make color and size adjustments without spending a lot of money.
The dish towels were simple to sew up. I cut them out along the grid lines and turned back the hem. I also sewed a small length of twill in one top corner of each dish towel for convenience.
7447964034_aaef18a2f9_z
The linen-cotton canvas is a beautiful fabric and will only improve with extensive washing and use. The really nice thing about these is that if they ever do suffer from wear and tear I can simply have more printed, without even having to dig the original paper copies out from storage.
7447965710_64e540ebb3_z
Addendum to original post (11/9/12):
It seems that there is an extra step involved to have your collage of tea towel designs print to fill the area of one yard of linen, which measures 54in width by 36in length, which equals 8100 pixels x 5400 pixels at 150 dpi.

When exporting out of Picasa, the image resolution will be 72 dpi, which is standard for web viewing but which caps the exported file size at 5120 pixel width x 3414 pixel length. Because of this, there is an extra step involved to increase the size of your design collage exported in Picasa before uploading to your design library in Spoonflower.
  • You can open the design in Preview on a Mac. Once open, go to Tools and Adjust Size. With "inches" toggled, enter in "54" width and "36" length and "150" for the resolution dpi. Export the resized file as a PNG, and then upload it to Spoonflower.
  • If you don't have access to a Mac computer, you might want to try downloading a program calledPaint Here is a great tutorial for resizing using Paint.   

Tuesday, June 25, 2013

Button Bracelets

Here is a really fun jewelry project for even the kiddos to join in on from Hope Studios!  Buttons are becoming art in themselves as you can find so many beautiful ones.  They can be almost as addicting as beads :)  I'm loving all these cute ways to incorporate these fashionable buttons into awesome jewelry!


Materials:

Buttons in various sizes (test to be sure your cord will fit into the holes)
Round leather or coated cotton cord (1 mm in diameter)


Instructions:

Arrange your buttons ahead of time to lay out your pattern


Begin with a length of cord about 18 inches long (you will adjust this to fit at the end, but cutting it too short will result in frustration and some swearing...trust me, I know). The more knots you intend to make the longer the cord.

Fold your cord in half and tie a knot in the looped end, like this:


Now, begin threading the cord through your button holes.

Criss-cross your cord for the 4 hole buttons like this:


The same is possible for the two holed buttons. Bring a cord up through each hole then back down the next hole like this:


You might also want to thread your button onto one piece of cord then knot, like this:


To finish off your bracelet, just pull the cord through the last button and tie in a square knot. See?


You can pull the last button through the loop at the other end to attach to your wrist.

Now, go crazy! Try to be random and mix it up, stack some, knot some, criss-cross some, there is no right or wrong way to do this! Get creative, girl!

You might end up with something like this:


Or simple shell and wood buttons look like this:


Or you could go nuts and work in some beads like this:


Now, gather some buttons, call up some girl friends, set the kids into the back yard to play, and have some fun!


PS (JoAnn's has some bags of fantastic HUGE buttons with HUGE holes for the little ones to get in on the act. It will be a HUGE relief to use these buttons for them.  A bloggy friend suggested dipping lengths of yarn in clear nail polish and twisting. Once dry, they will thread easily for the kiddos.)

Monday, June 24, 2013

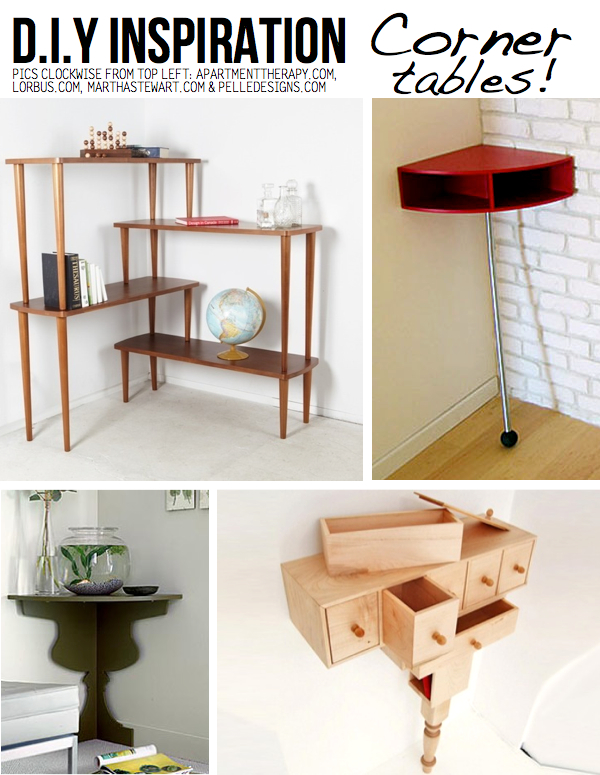
Need to Fill that Empty Corner? ~ Try These Ideas

cLEVER cORNER iDEAS

CLEVER CORNER D.I.Y IDEAS

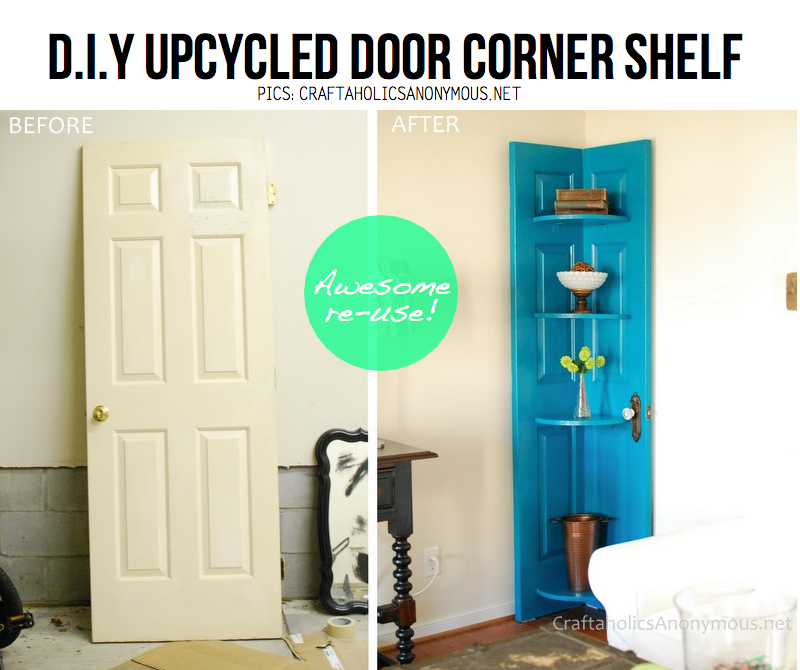
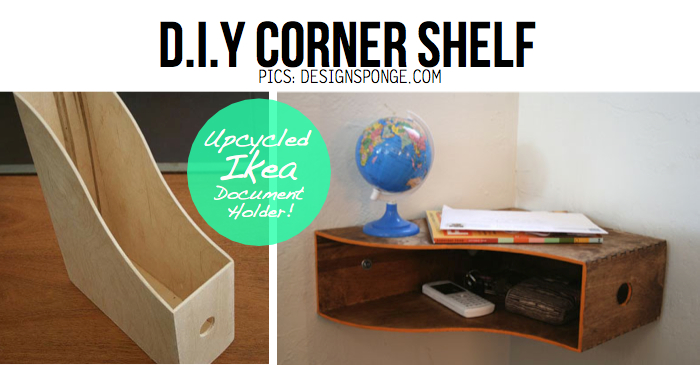
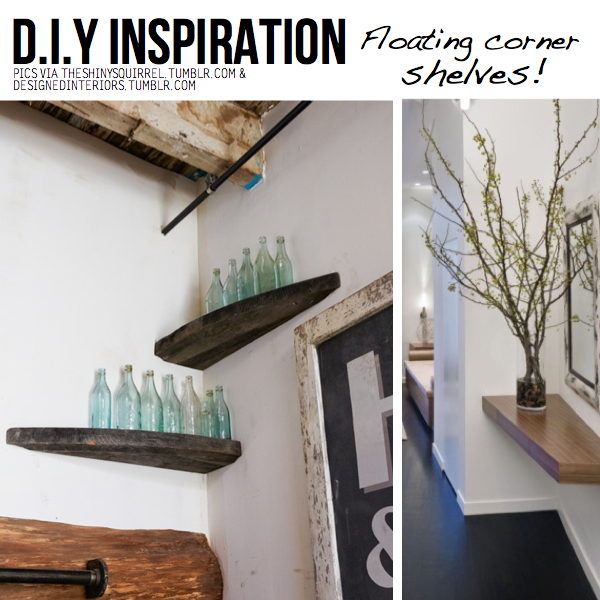
Let creativity sprawl into each and every corner of your home – literally! Narrow corners are surprisingly often overseen and deemed ”impossible” to make something out of…Challenged by this ‘fact’ (further enforced by the lack of pre-made corner solutions from furniture retailers) I thought I’d gather a bunch of corner D.I.Y ideas proving the ‘corners are impossible’ notion wrong…
Pics via here & here
Pics via here & here
Corner table/shelf DIY Ideas, clockwise from top left: Stacked table DIY idea spotted here, red table spotted heregreen DIY corner table from Martha Stewart & lastly naturally clever design from PelleDesigns, spotted here
With those ideas in mind, I hope you feel inspired to inject some love and functionality into a forgotten corner or nook around your house. Topping things off, I’d like to share this very true quote:
”Clean out a corner of your mind and creativity will instantly fill it” / Dee Hock

Friday, June 21, 2013

Pork Tenderloin with Pan Sauce---umumum!


Pork Tenderloin with Pan Sauce

Pork Tenderloin marinated in olive oil, soy sauce, red wine vinegar, lemon juice, Worcestershire sauce, parsley, dry mustard, pepper and garlic

This is my "go-to" pork tenderloin recipe. It's pretty foolproof and sure to be a hit with all-ENJOY!


I served this up with some roasted "teeny-tiny" baby potatoes and my daughter's favorite veggie, brussel sprouts!

Ingredients:
1⁄2 cups olive oil
1⁄3 cup soy sauce
1⁄4 cup red wine vinegar
Juice of 1 lemon
1-2 tbsp Worcestershire sauce
1-2 tbsp fresh parsley, finely chopped
2 tsp dry mustard
Freshly cracked black pepper, to taste
4 cloves garlic, peeled and minced
1 1-lb. pork tenderloin (silver skin removed)

Directions:
Combine all marinade ingredients and reserve 2-3 Tbsp. Place the pork tenderloin and marinade in a Ziplock bag and let marinate for at least 3-4 hours.
Preheat oven to 350 degrees. In a hot skillet over medium-high heat, sear each side of tenderloin for 2-3 minutes. Place in the oven and cook for 30-40 minutes or until the meat has reached 160 degrees. Let rest for at least 5 minutes before slicing.

Pan Sauce:
Pan scrapings from pork tenderloin
1/2 cup of chicken broth
2-3 tbsp of pork marinade (thoroughly mixed)
1-2 tsp butter

Meanwhile, place the skillet back on the stove over medium heat. Add the chicken broth and scrape up all the browned pieces from the bottom of the pan. Add the marinade and let it boil down for 2-3 minutes. Add the butter and remove from heat stirring until butter has melted. Pour over the pork tenderloin.

Thursday, June 20, 2013

Service Projects For Kids

These are some very awesome ideas to help your kids be more involved and active in their community.  Doing service projects is also a great way for your kids to learn how to serve others, teamwork, and respect for others and property.  During the summer we go "park hopping" around the base here and have noticed how much trash is left at these parks. From now on, we are bringing a bag with us and will clean up the parks that we go to play at.  Start with something small and see where that leads your kids!  From KidWorldCitizen


35 Service Projects for Kids


Here is a list of service projects and opportunities for kids to volunteer within their community that will empower kids with responsibility, engage their compassion, and offer them the chance to affect the lives of others. Service projects to serve the elderly, service projects working with younger children, service projects that help the environment… locally and globally, kids can make a difference!


1. Make Valentine’s for Senior Citizens.

2. Collect sleep-away camp items for Camp Dreamcatcher, a program for children whose lives have been affected by HIV/AIDS.

3. Donate kids’ craft kits to a local children’s hospital.

4. Organize a board game night at your local nursing home. Gather your friends and favorite classic games, and plan a fun afternoon.

5. Decorate placemats for Meals on Wheels.

6. Wrap gifts during the holidays for Barnes and Noble to raise money for a specific cause.

7. Make a no-sew fleece blanket for a child in need through Project Linus.

8. Organize a food drive in your neighborhood, church, or school.

9. Have a garage sale or lemonade stand for your favorite cause.

10. Plan an afternoon of fun: crafts, a movie and popcorn afternoon, or a kickball tournament at a children’s home or refugee center. Plan a day of fun!

11. When school supplies are very cheap at the beginning of the year, pack up a backpack and supplies for a local child in need (the YMCA frequently collects these, in addition to other organizations).

12. Bring gently used board games and decks of cards to a local homeless shelter.


13. Put on gloves and pick up litter at your local park.

14. Write a letter to your elected official about a cause you believe in.

15. Collect DVD’s and videogames you no longer use/watch and donate them to a Children’s Hospital for patients, or to KidFlicks, an organization that set up movie libraries in the children’s wards of hospitals.


16. Volunteer at an animal shelter- play with the dogs and cats, help to brush them, and clean up after them.

17. Read stories to or share your talent with younger children. Be a positive role model that kids can look up to!

18. Work with your local high school or college to place empty boxes on campus at the end of school. Collect textbooks for students who need them in Tanzania, Sierra Leone, and other African nations (and keep them out of landfills!).

19. Stuff warm socks with snacks and fruit to pass out to people who are homeless.

20. Secretly rake leaves or shovel snow for a neighbor in need.

21. Make sure your school is recycling- talk to your city hall to get recycling bins for all of the classrooms and make posters to explain what materials can be recycled.

22. Hold a “dog wash” to raise money for a local animal shelter.

23. Volunteer to read letters or the newspaper to residents in nursing homes.

24. Collect used sporting equipment and donate to communities that do not have access (such as IAYS that works with the Peace Corps to deliver worldwide).

25. Donate used baby and toddler toys to a nearby church, synagogue, mosque, or temple for their youngest members. Most places of worship have a place for little ones to be entertained during services.

26. Buy a kit from KidKnits- yarn made by widows in Rwanda or Chile, that comes with instructions to knit a hat plus cultural information. A simple craft to change the world!

28. Go through the books you’ve grown out of and donate them to the waiting room of a local dentist or doctor.


29. Grow extra fruit and vegetables in your garden to donate to a food bank.

30. Hold a spa day at a nearby nursing home for residents: paint their nails and do their hair and make-up.

31. Donate your gently used stuffed animals to a local firehouse or police station to give to children in emergencies.

32. Find out when the next sporting event is for your local Special Olympicsteams, and go there as cheerleaders for the participants with signs, balloons, and noisemakers.

33. Work with your friends to make a “New Student” guide to your town that includes your favorite parks, a map of the neighborhood, and fun things to do.

34. Plant a garden or tree that your school or neighborhood can enjoy.

35. Promote bike-riding and carpooling at your school to reduce traffic and air pollution.

If you’ve enjoyed these ideas, check out these tips to teach your kids empathy, these incredible kids doing community service projects and our day filled with random acts of kindness.