Growing Celery Indoors: Never Buy Celery Again

Remember when we tested and shared how to grow onions indefinitely last week? Well, at the same time, we've been testing out another little indoor gardening project first gleaned from Pinterest that we're excited to share the successes of today — regrowing celery from it's base.
We've figured out how to literally re-grow organic celery from the base of the bunch we bought from the store a couple weeks ago. I swear, we must have been living under a rock all these years or just not be that resourceful when it comes to food, but we're having more fun learning all these new little tips and tricks as we dive deeper into trying to grow more of our own food.
This project is almost as simple as the onion growing project — simply chop the celery stalks from the base of the celery you bought from the store and use as you normally would. In our case, we had a particular homemade bean dip that needed sampling!

Instead of tossing the base, rinse it off and place it in a small saucer or bowl of warm water on or near a sunny windowsill — base side down and cut stalks facing upright.

We let our celery base hang out in the saucer of water for right around one week, give or take. Over the course of the week, the surrounding stalks began to dry out significantly, but the tiny little yellow leaves from the center of the base began thickening, growing up and out from the center, and turned a dark green. The growth was slow, but steady and evident.


After the 5-7 days were complete, we transferred our celery base to a planter and covered it completely save for the leaf tips with a mixture of dirt and potting soil.


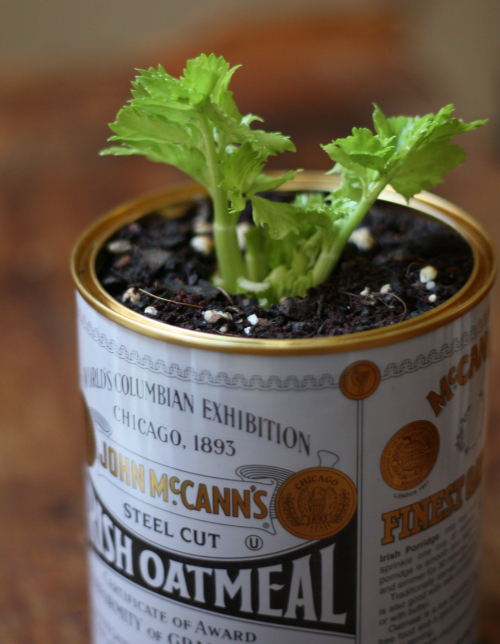
We watered it generously and after planting in the soil, the overall growth really took off. Not only do we have celery leaves regenerating themselves from the base, but you can see clear stalks making their way up and out. It's truly fascinating what we have not even a week after planting in the soil:

- Change out the water every couple of days while in the "saucer" phase of the project. We also used a spray bottle to spray water directly onto the base of the celery where the leaves were growing out.
- The tutorials we saw showed planting the celery directly into the dirt outside — you may want to go this route if you live in a temperate area or want to be able to harvest outdoors. We went with an indoor planter since it's still pretty cold here in VA, we have limited outdoor space in the city, and the space we do have is currently unprotected from our curious puppy.
- Continue to generously water the celery after planting to keep it thriving.
- + - + - + - + - + - + - + - + - + - + -
Update 1: After a few more weeks of growing time in our sunny window, our celery has continued to thrive. The leaves have grown out generously and bushy and the celery stalks underneath have really taken shape:


- + - + - + - + - + - + - + - + - + - + -
Update 2: Here's how we are looking at almost 3-4 weeks of growth:


Find the full 3-4 week update with even more pics and details on the progress in this post.
- + - + - + - + - + - + - + - + - + - + -
Update 3: Here's how we are looking at almost 5 months of growth, still indoors and still in the same planter:


At this stage, we've been actually been able to cut off stalks as needed in recipes and the celery continues to regenerate leafy stalks from the center of the plant. Find the full 5 month update with even more pics and details on the progress in this post.
- + - + - + - + - + - + - + - + - + - + -
For anyone wondering about the planter, we made it by recycling a tin of steel cut oats we'd since finished. We simply cleaned it out well, then punctured holes along the base to create drainage for the plant.

We placed a thin layer of mulch at the base to help with drainage, followed by a thick layer of dirt/potting soil mixture. After placing the celery base snugly in the planter, we filled the remaining space with more dirt/potting soil to completely cover the celery base. We kept the top to the oats tin and flipped it over to place the new planter on top of it — the lid is a perfect custom fit to the base and catches any runoff from regular watering.
As usual — we'll be sure to keep you posted on the progress of our container celery and hope you'll let us know if you decide to try it out for yourself! If you've tried this before, what other types of vegetables have you known to be able to regrow itself in a similar way?
That is amazing! I would have never thought you could regrow celery that way. As it's below freezing here still, I will definitely do this inside :)
ReplyDelete