Friday, March 8, 2013

Solution for Good Dressing ~ Olive Garden Dressing


Olive Garden Salad Dressing

The Country Cook.net

I think one of my favorite things to do is to recreate my favorite restaurant meals at home.
Sometimes I get a really good end result, sometimes it is total crap. 

But the process itself is enjoyable for me. 

Now, if you follow my blog, then you know I always say that even though recipes can sometimes come close to those restaurant favorites, I will never say it tastes exactly like what you get in the restaurant.
Because many times, we just don't have access to certain ingredients that the restaurants do but we can sometimes
 get the taste pretty darn close.
And also, there is just something about eating out that makes food taste better sometimes.
First of all, you didn't have to cook it.
Second of all, you won't have any dishes to wash.
Thirdly, you're out on the town having a really great time with good folks.
All that adds up to a very tasty and enjoyable meal. So even if you can recreate the taste at home, you can't exactly recreate the experience because those dishes ain't gonna wash themselves.
Having said all that, it's still fun to try.

And one of those recipes that I had to try is the good ole Olive Garden Salad Dressing. 
It's kinda like the holy grail of salad dressings.
If you've never eaten at an Olive Garden, be sure to put it on your bucket list. 
Most folks like to go there for the salad and breadsticks alone.

So I'm gonna say that even if you don't think this dressing tastes exactly like the one at Olive Garden,
 I think you're still gonna really like the way it tastes.

Ingredients:
1 packet Good Seasonings Italian Dressing
(Ingredients needed to make dressing; oil, water, vinegar)
localoffersIcon
½ tsp. dried Italian Seasoning
½ tsp. table salt
¼ tsp. black pepper
½ tsp. sugar
¼ tsp. garlic powder
½ tbsp. mayonnaise (no Miracle Whip, please)
¼ cup olive oil
localoffersIcon
2 tbs. white vinegar
1 ½ tbsp. water

Save Now

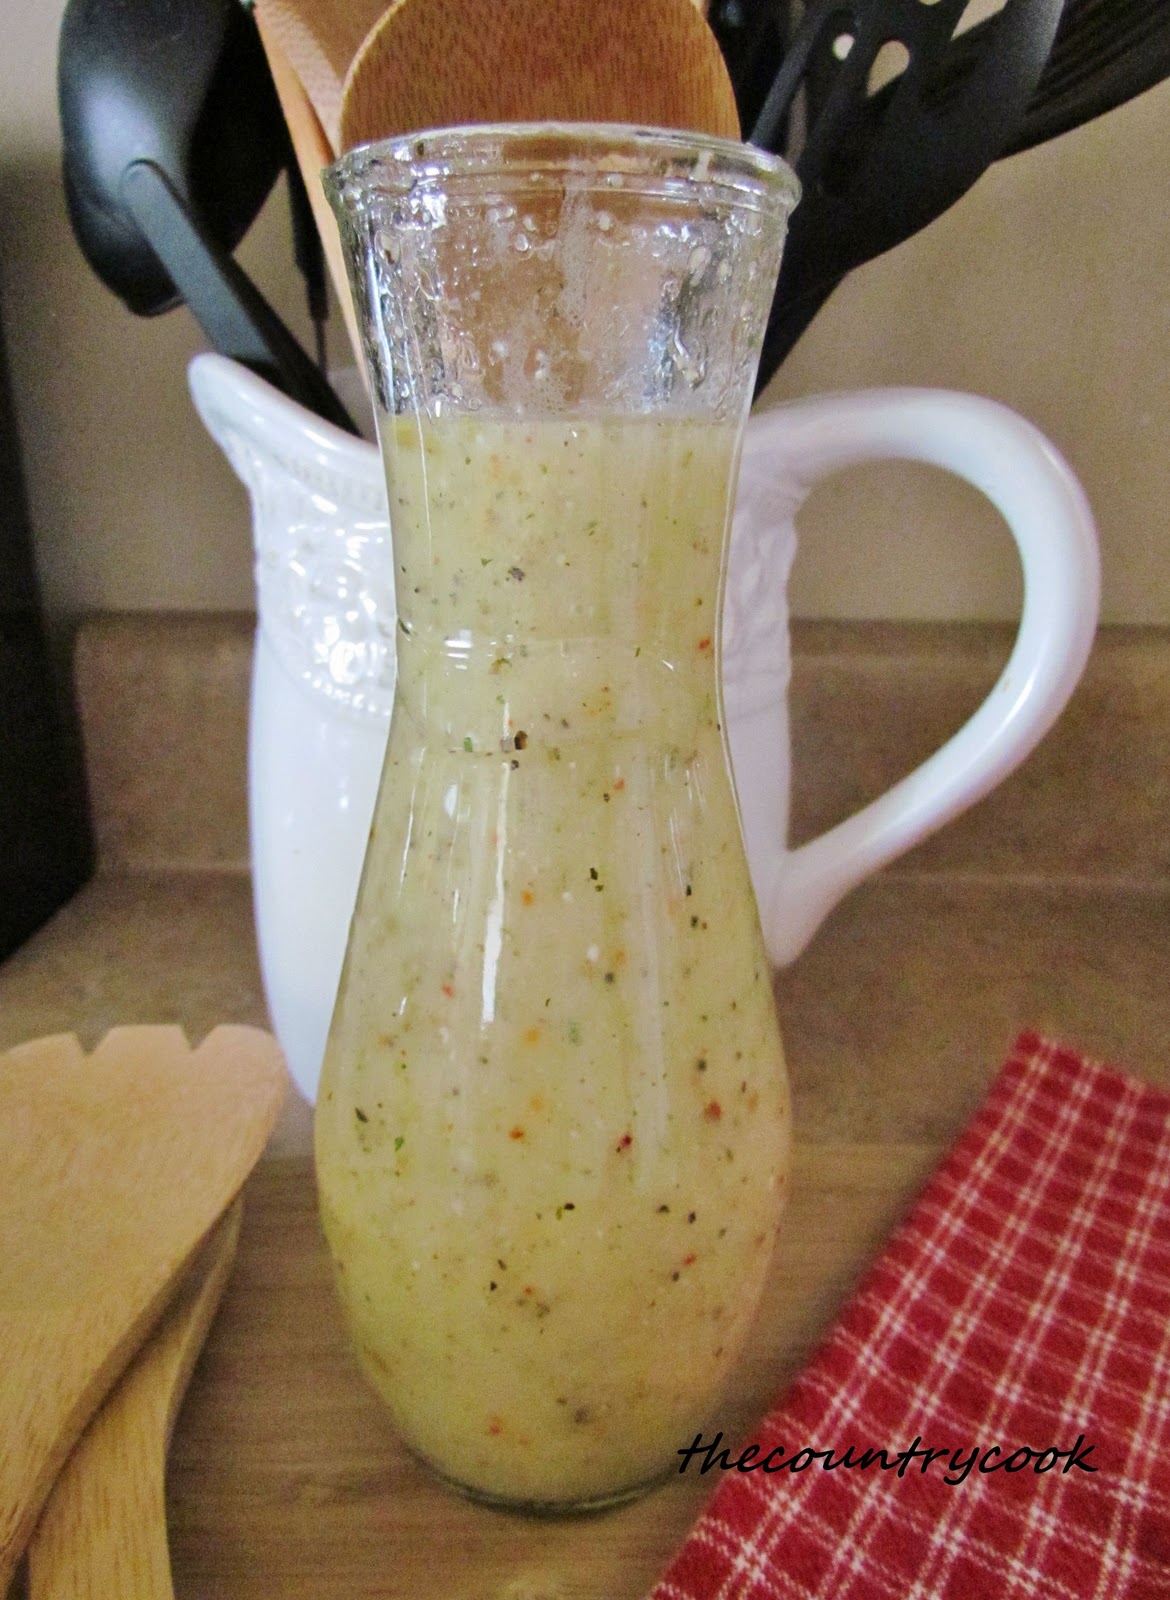
If you've never seen Good Seasons Italian Dressing before, you can usually find it down the aisle in your grocery store where all the other salad dressings are.  The packets are usually near where they keep the packets of ranch dressing. Most stores carry the boxed sets that also come with the salad dressing cruet like the one I have above.
Directions:
Prepare Good Seasonings Italian Seasonings Dressing as it states on back of packet.
The packet makes just a small bit of dressing.
Once prepared, pour dressing in a medium bowl, then add additional ingredients
listed above (starting with the dried Italian Seasoning).
Using a whisk, mix all ingredients until mixed thoroughly combined and pour it into a container with a lid.
Mason jars also work well for this.
Serve with your favorite salad fixings.
Store unused dressing in a sealed container in the refrigerator for up to 4 weeks. 
Be sure to give the bottle a good shake before using.
Enjoy!

Thursday, March 7, 2013

Things to Do with a Cardboard Box

This has gotta be one of the coolest group of ideas I have ever found!  It's from the blog boys GERMS.  Call me a kid at heart, but I LOVE all these great ideas just with a card board box.  My kids and I have made lots of cool things from old cardboard boxes, but really not this cool!!  My absolute favorites are the Mailbox, Ball Run, and Laptop!  So cool!!!


25 Ideas for a Cardboard Box! From boys Germs

Here are some cardboard box ideas that you can create with things around the house. Perfect for a rainy day!
1. Pirate Ship 2. Cafe 3. Race Car 4. Guitar 5. Kitchen 6. Planets in a Box 7. Shoe Box Cars 8. Mystery Box 9. Car Park Station 10. City in a box 11. Mailbox 12. Castle 13. Laptop 14. Barn 15. Ice Cream Shop 16. Car Wash 17. Oven 18. Scooter 19. Cubby House 20. Ball Run 21. General Store 22. Bus 23.Dinosaur Feet 24. Car and Train Station 25. Rocket

Wednesday, March 6, 2013

How to Cover Chipboard

This was a great tutorial for me as I am also a scrap booker and I have tons of chipboard, but I can never seem to cover it perfectly.  Well, thanks to TLC, now we all can.  Not only does Allyson Keller share her secret to covering chipboard and/or wood with scrap booking paper, she also shows an adorable craft at the end - which I can't wait to make for my kiddos!!


Brighten up any space with personalized custom wall art. Create a one-of-a-kind gift for a new baby or housewarming, or change the look of any room in your home with this inexpensive and easy project that can be completed in an afternoon.
Supplies Used:
  • Wooden letters (available at any mass craft store)
  • Coordinating 12x12 patterned paper - one sheet per letter
  • Xyron Creatopia with permanent adhesive refill
  • Craft mat
  • Craft knife/Exacto knife
  • Sandpaper
  • Assorted coordinating embellishments
  • Coordinating ribbon
  • Mini Glue Dots
  • Craft Glue Dots
  • Scissors
Gather all of your supplies/embellishments together and lay out your letters to determine which patterned paper you will use with each letter.
To begin decorating letters, lay patterned paper face down on a craft mat. Apply adhesive to the front of the wooden letter and lay adhesive side down on top of the patterned paper. TIP: because most letters have a flat edge, line up one flat edge of the letter with one edge of the paper for an easier, straighter cut.
Allyson Keller
Using the craft knife, cut around the edges of the wooden letter until you have cut completely around it.
Allyson Keller
Allyson Keller
Pull the scraps of paper away from the letter. If some areas did not cut completely or have a rough edge, use a small piece of sandpaper to smooth.
Allyson Keller
Allyson Keller
Lay wooden letter patterned paper side up and embellish with assorted buttons, flowers, ribbons, or any craft items you have available. TIP: If you prefer, apply patterned paper to all of your letters first, then lay them out and embellish the entire set at one time.
Allyson Keller
Allyson Keller
Allyson Keller
Allyson Keller
Allyson Keller
The completed letters can be displayed in a variety of ways. Apply small hangers to the back of each letter, loop ribbon and apply to the back of each letter with a staple gun for hanging, or display them on a shelf or tabletop.
Allyson Keller
The possibilities are endless with this project. Choosing your own patterned paper and embellishments allows you to create wall art that will coordinate with any theme or color scheme in your home

Tuesday, March 5, 2013

Make your own Jewelry Box

For our Jewelry Spotlight today- I have an awesome tutorial from Some Sweet Little Dream, making a jewelry box.  So simple and beautiful!  Make one for yourself and make one as a gift!!  This jewelry box can be made from any box you have and she used cloth napkins for the "holder."


DIY: Jewelry Box/Ring Holder

Add caption


Hello! Today I want to share with you a DIY project: Jewelry Box. You can use any box you have, doesn't matter what size or color. I happen to use this pink box so I match the color using pink cloth napkins. The reason why I use cloth napkin is the texture, thicker than other fabric that I had so it will be more easier to fold and place into the box.
Simple steps as pictures above. (feel free to leave a comment if you have any question.)

Thanks for reading!

Monday, March 4, 2013

Great Ideas for Storing All Your Scrapbook Stickers


From  Creating Keepsakes Magazine

5 Easy Ideas for Storing Your Stickers
Organizing your sticker stash doesn't have to be a sticky situation. Thanks to these five simple approaches, it's a breeze to find an orderly system that works for your unique scrapbooking style.
1. On-the-Wall Container: Store your stickers in a decorative rack that you can hang above your creative workspace. This approach will keep the creativity at your fingertips without interfering with your desk space.


2. DIY Sticker Spinner: Finding the sticker sheet you need is just a twist away with this organized approach. Turn a paper-towel holder into a rotating sticker station by first sliding pieces of sturdy cardstock into 8.5" x 11" sheet protectors (for added stability) and then inserting your stickers. Once your page protectors are loaded, attach them together with binder clips, and slide those clips around the center of your paper-towel holder.

         
Bonus Idea: If premade is your preferred method when it comes to finding organization solutions, check out theClip-It-Up by Simply Renee.


3. File-Folder Organization: You don't have to be a legal eagle to find the benefits in accordion-file folders. They're an ideal choice for stashing your stickers. For one, they open up nice and wide, giving you easy access to the contents. Also, they can quickly be tucked away when you're in between craft happenings. Plus, if you like to scrap on the go, they're a wonderful grab-and-go solution!

4. Basket Case: Add a decorative touch to your creative space that doubles as organization with a stylish basket. Whether you have one basket for all of your stickers or you choose to keep separate baskets for separate sticker themes, this approach will keep your collection out where you can see it and make the most of it!

5. On the Wire: Maximize your closet space, and hang your favorite sticker sheets across a curtain wire. This will leave you more shelf space for larger and heavier items, and you can just slide the stickers aside whenever you need to access the rest of your closet-contained goodies.

Ready to try out these sticker-organizing ideas? Enter here to win a stash of 100+ sticker sheets.
--Hoeppner, Creating Keepsakes creative  editor

Friday, March 1, 2013

Great Breakfast Recipe for the Weekend


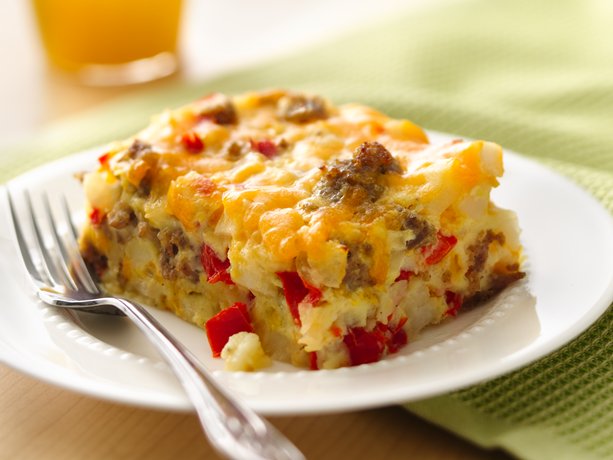
Impossibly Easy Breakfast Bake (Crowd Size)

Impossibly Easy Breakfast Bake (Crowd Size)
Ringing the breakfast bell has never been easier! Enjoy all the traditional tastes of breakfast in one easy bake.
www.bettycrocker.com

  • PREP TIME20 Min
  • TOTAL TIME1 Hr 10 Min
  • SERVINGS12


    2
    packages (12 oz each) bulk pork sausage
    1
    medium bell pepper, chopped (1 cup)
    1
    medium onion, chopped (1/2 cup)
    3
    cups frozen hash brown potatoes
    2
    cups shredded Cheddar cheese (8 oz)
    1
    cup Original Bisquick® mix
    2
    cups milk
    1/4
    teaspoon pepper
    4
    eggs
    • 1Heat oven to 400°F. Grease rectangular baking dish, 13x9x2 inches. Cook sausage, bell pepper and onion in 10-inch skillet over medium heat, stirring occasionally, until sausage is no longer pink; drain. Stir together sausage mixture, potatoes and 1 1/2 cups of the cheese in baking dish.
    • 2Stir Bisquick mix, milk, pepper and eggs until blended. Pour into baking dish.
    • 3Bake uncovered 40 to 45 minutes or until knife inserted in center comes out clean. Sprinkle with remaining cheese. Bake 1 to 2 minutes longer or just until cheese is melted. Cool 5 minutes.

    Expert Tips

    If you'd rather make a smaller recipe using a 9-inch pie plate, cut all ingredient amounts in half and bake 30 to 35 minutes.