DIFFERENT WAS TO RECYCLE COOKIE SHEETS
How to Make Cookie Sheet Chore Charts

- Scotch® Pro Thermal Laminator
- 2- 8.5″ x 11″ Laminating Pouches
- Designer Scissors
- Quick-Dry Adhesive
- Scotch® Expressions Decals – this project used “Backwoods” design
- Cookie Sheet – 1 for each child
- 3/4″ Circle Magnets
- Washi Tape in coordinating colors
- 1 can of Spray Paint
- Cardstock in coordinating colors
- Hot Glue Gun
- 1″ Circle Paper Punch
- Die Cutter
- Drill
- 1.5″ wide Orange Ribbon – about 3 yards
- Chore Chart and Progress Chart Printable {I found mine here.}
Step-by-Step Instructions:

- Print out a free chore chart and progress chart printable of your choice and use the laminator and laminating pouches to laminate the sheets.
- Spray paint the cookie sheet using 2-3 coats of paint. Set aside and allow it to dry thoroughly.

- Use a 1-inch circle punch to punch out the pictures of each chore, leaving the progress chart in tact.

- Using a hot glue gun, adhere one chore picture to one magnet. Repeat until all chore pictures have a magnet on the back.

- Use a die cutter to cut 2-inch letters to spell your child’s name with the cardstock. Then, use the die cutter to cut 2-inch letters to spell out “To Do” and “Done” with the card stock.
- Adhere the letters of your child’s name to the top of the cookie sheet using the quick-dry adhesive.
- TIP: You can use washi tape to help apply the letters straight.

- TIP: You can use washi tape to help apply the letters straight.
- Apply strips of washi tape in the color of your choice to the cookie sheet in an “I” shape. Use the scissors to trim off the excess. If you don’t mind an uneven edge on your washi tape, you can simply tear it instead of cutting with scissors.
- Use the quick-dry adhesive to adhere the “To Do” and “Done” letters to the cookie sheet in the two rectangles that you created with washi tape in Step 7.

- Cut around the progress chart at the bottom of the free printable and apply to the cookie sheet with hot glue.
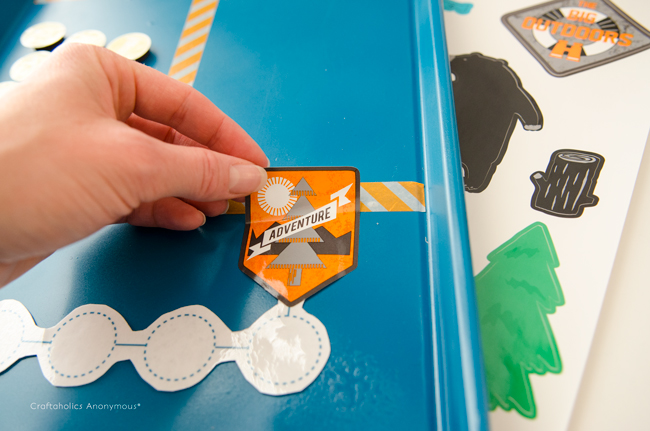
- Let your child pick out a Scotch Expressions Decal that represents the prize they are working to earn. For example, use the Backwoods designs to indicate a camping trip to work towards.
- Have your child adhere the decal to the end of the progress chart as a reminder of the goal. Since the decals are removable, they can choose different ones each week to represent new prizes.

- Use a drill to create two holes in the top handle of the cookie sheet. Thread ribbon through the holes and tie in a bow. Then hang on the wall.
- NOTE: Be sure to follow manufacturers’ guidelines for using drill and always use safety glasses when using power tools.
- As your child completes chores in the “To Do” section, move the magnets to the “Done” section and move the letter one space to the right in the progress chart.
Is your coffee table looking a little bare-bones these days? Are you always playing hide and seek with your remote? Or, do you just want an excuse to be served breakfast in bed? Forless than $10, you can transform an old baking sheet into a unique serving tray that’s functional and beautiful. Here’s how to make your own fabric serving tray:

You’ll need: A yard of fabric (pick one that matches the room’s décor), spray adhesive, scissors, plastic knife, a baking sheet, felt (optional).
1. Cut your yard of fabric large enough so that it completely covers the front of your baking sheet and a small part of it can be wrapped around the backside.
2. Liberally spray the front of the baking sheet with spray adhesive.
3. Place your fabric in the center of your baking sheet. Quickly (before the adhesive dries) smooth the fabric onto the tray. Start from the top and work your way down, pressing out any air bubbles.
4. Take your plastic knife and press it into the edges and corners of the baking sheet until they become well defined.
5. Flip the tray over and spray the back with adhesive. Pull the fabric taut against the edges (for crisp lines) and then fold the remaining fabric onto the back of the tray. Start with the top two edges, and then fold the bottom two. If you have any extra fabric, trim it away with scissors.
6. If you want to make your new serving tray slip-proof, cut a piece of felt for the bottom of the tray and attach it with the spray adhesive. Bonus: This will help hide any remaining fabric edges, creating a more “finished” look.
7. Let it dry, and you’re done! This tray will look great on your coffee table or ottoman, and can hold anything from remote controls to cups of coffee. (Using it for breakfast in bed is optional, but we recommend it!)
Summer Road Trip #2: DIY Travel Games
Pin It Now!


Hi again from Washington!
We're loving the site seeing and family visits, but that trip home is just around the corner. And come Saturday, we'll be breaking out our el cheapo Thrive-friendly travel games to keep those kids entertained all 14 hours.
But instead of spending money on travel games at the store, I cheated (and you can too!)
Want to make your own?
For these travel games you'll need:
And a quick copy/paste from google of your favorite board games. I printed mine out back to back and then lamenated them for good messure.
This is so stinkin' easy.
You can use any magnets you have on hand--circles, magnetic tape or even the cheapie magnets that come with the phone book--to both hold the game boards in place and make the game pieces.
See?
Chutes and ladders + magnetic tape game pieces + regular dice instead of a spinner. The lip of the cookie sheet keeps the dice from rolling away.
Yahtzee is easy with laminated sheets, markers and dice.
Connect Four + circle magnets.
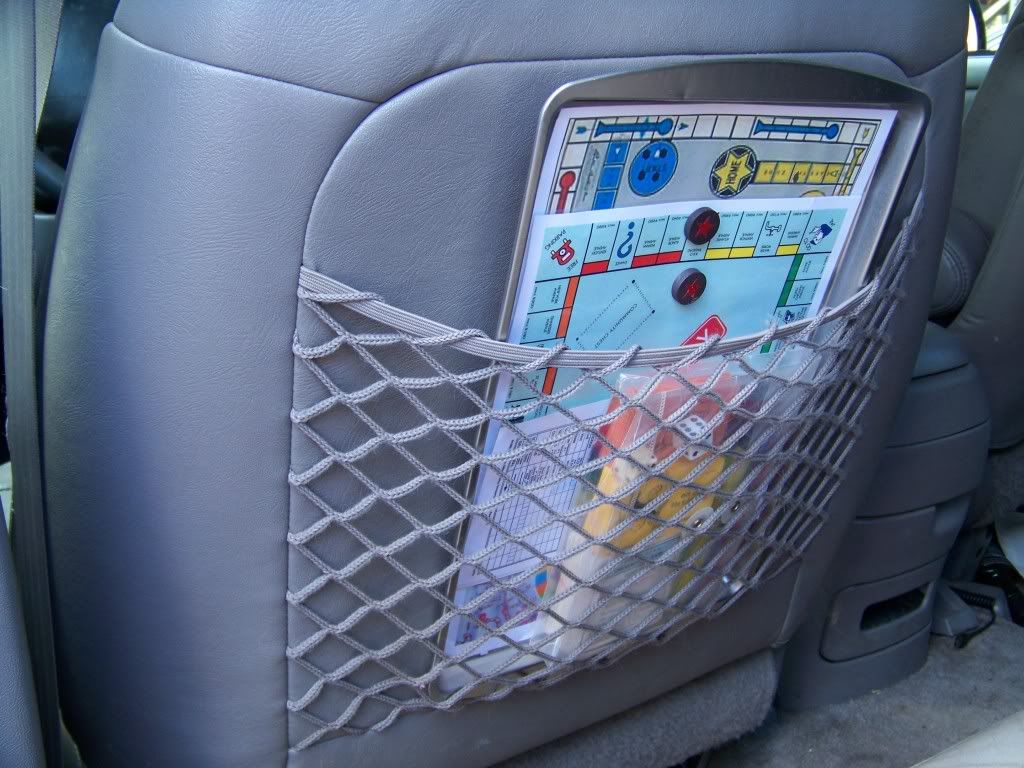
Monopoly with magnet tape used for markers ...
... and houses and hotels.
Money is recorded on paper and real estate / community chest cards are kept in check with little pig tail rubber bands.
And everything stays neet and tidy in a little coupon organizer or zip lock bag.
And the best part (besides being practically free) is how quick clean up is: boards and games pieces store easily on the cookie sheet ...
... and everything fits easily in the back of the seat.

Done and done.
So have fun making your own travel games for road trips or just around time.
Wish us fun on the drive home!
Don’t Toss Your Cookie… Sheet! (Magnetic Memo Board)
November 6, 2014 · By · 39 Comments


No comments:
Post a Comment