Wednesday, February 19, 2014

Matchboxes ~ All Dressed Up

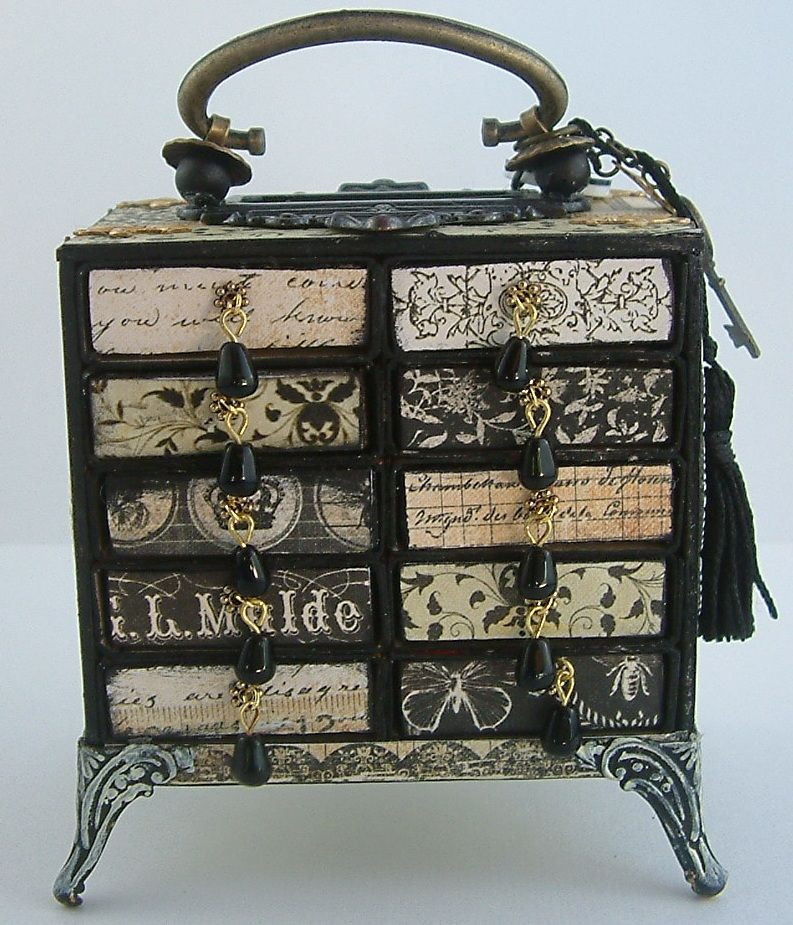
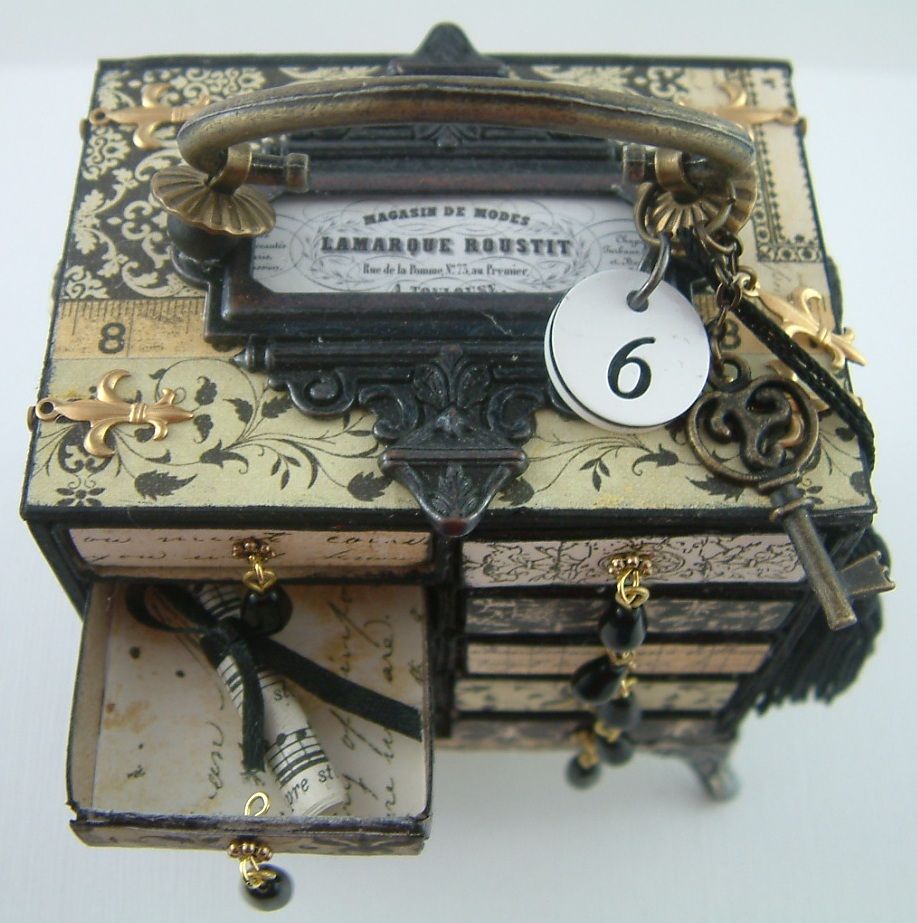
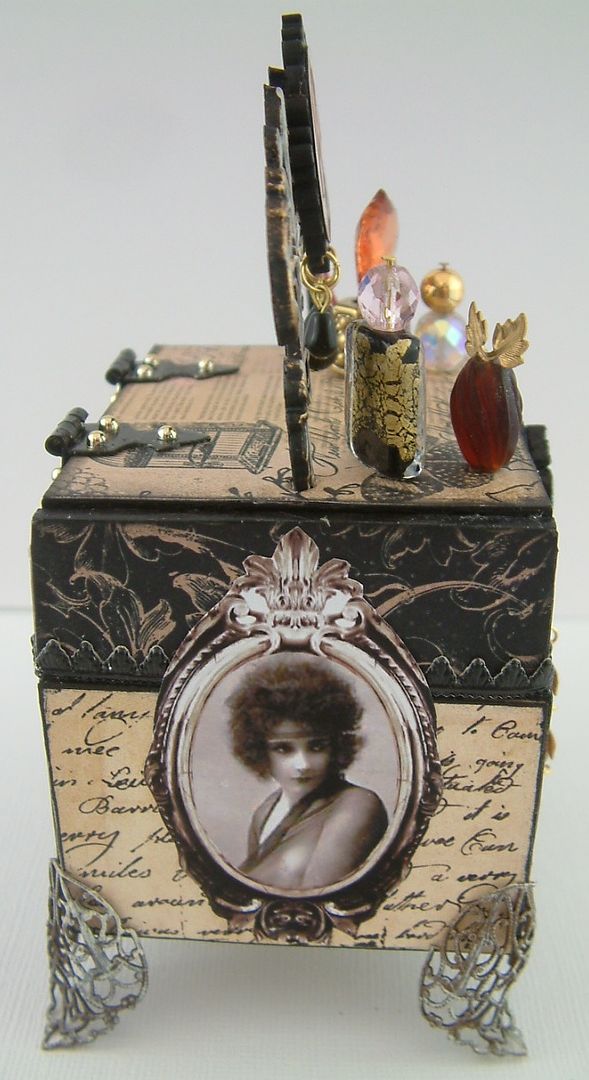
Matchbox - Dressed Up
from Pinterest:  http://www.pinterest.com/pin/14214555048331206/


Video Tutorial – Making a Chest Out Of Matchboxes – Designed for Alpha Stamps
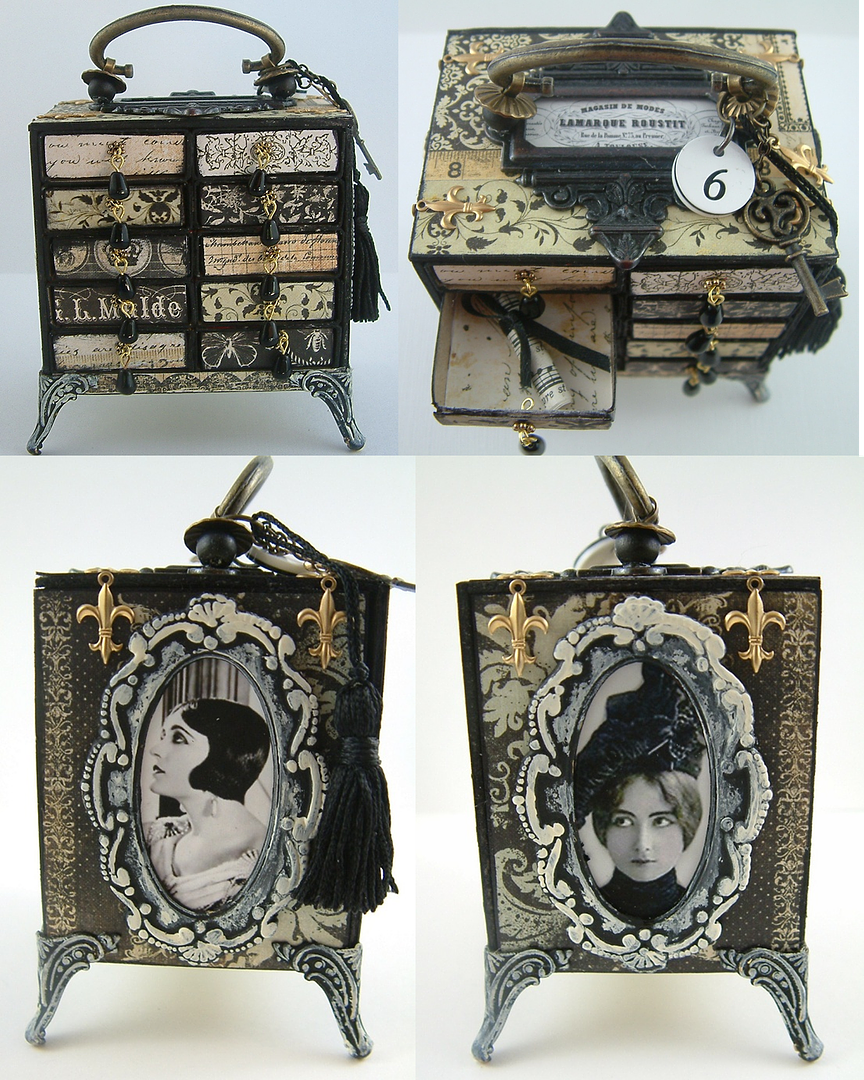
I’m so excited to be bringing you my first evervideo tutorial and to share with you how to make a Matchbox Chest.
The overall size of the chest including the feet and handle is 4 ½” tall by 3 ½" wide.  This chest would make a perfect gift (if you can stand to part with it).  You can fill the drawers with love notes, candy, charms, jewelry or little pieces of art like Inchies.
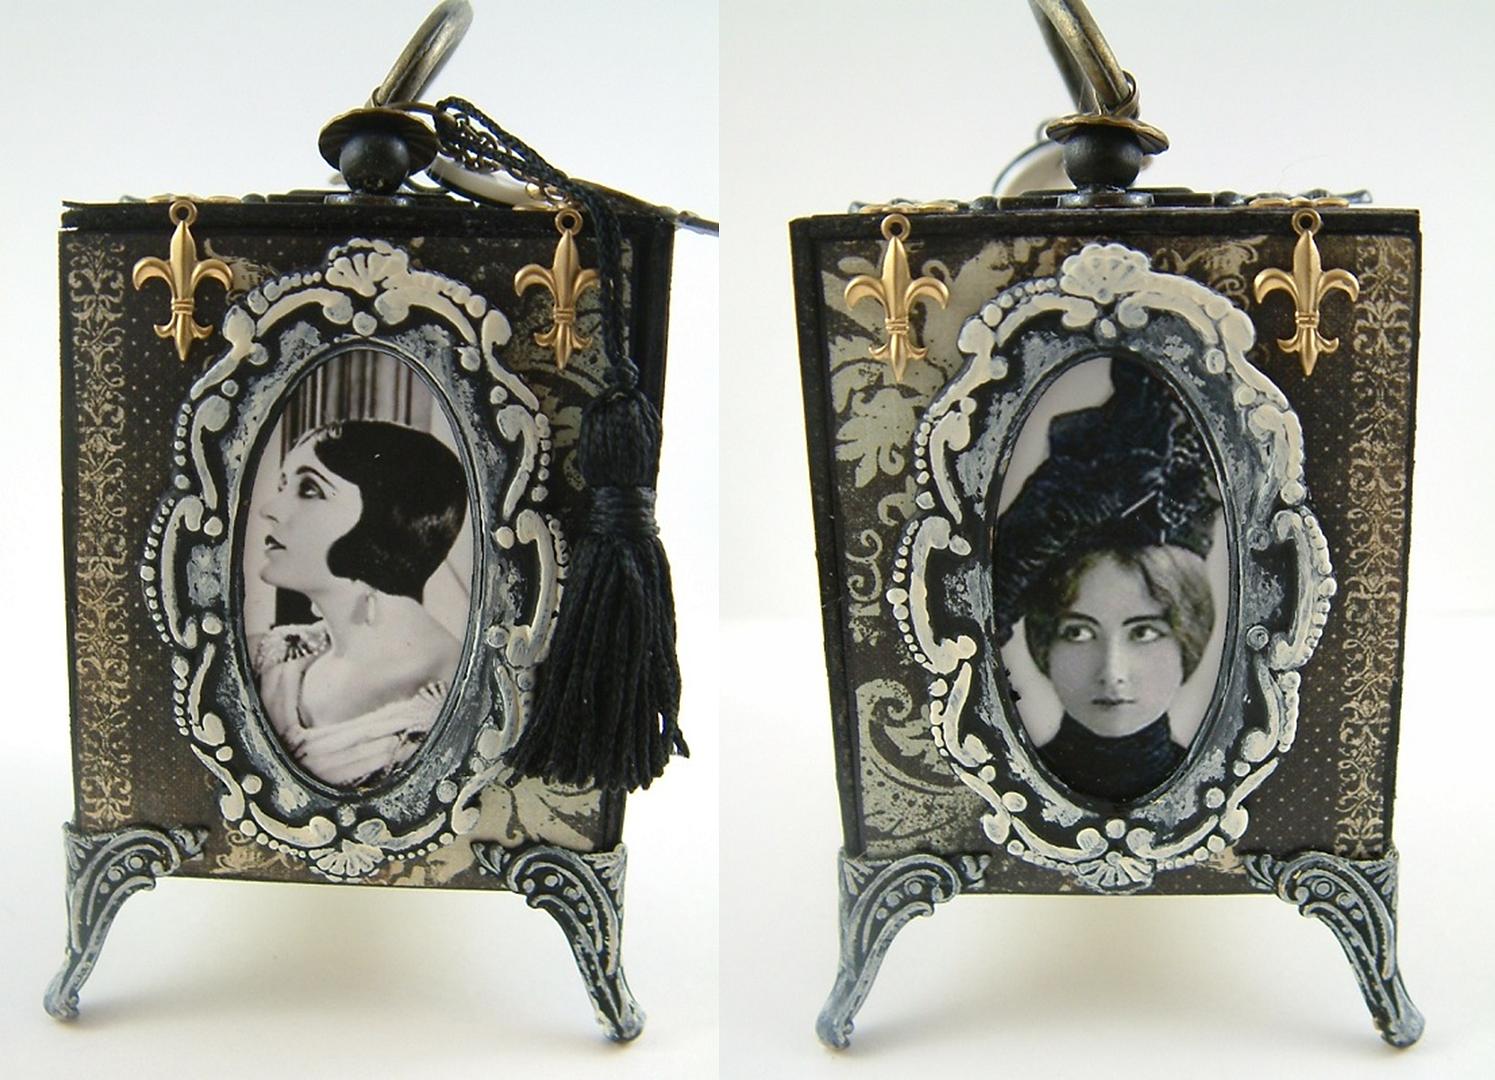
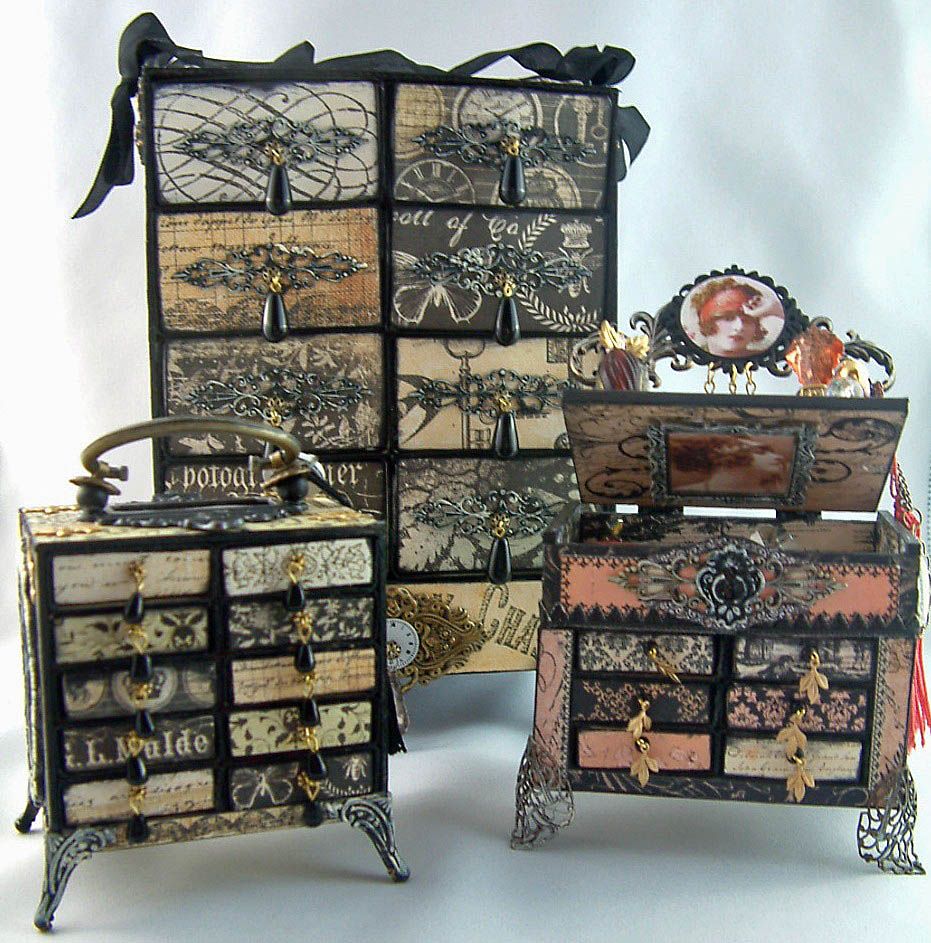
In the tutorial I’ll cover the supplies you’ll need and the steps to create this matchbox chest.  I’ve also created two other versions of the chest to give you even more ideas of what you can do with matchboxes.
So sit back and relax and enjoy learning how to make a chest out of matchboxes.

VIDEO PART ONE
Be sure to watch part one before watching part two.

VIDEO PART TWO
As a companion to the video, I’ve created a PDF document that contains the supply lists for all three versions of the matchbox chest and the detailed instructions that are in the video.
Products I Used That You Can Find At Alpha Stamps
French Labels Collage Sheet

MORE IDEAS
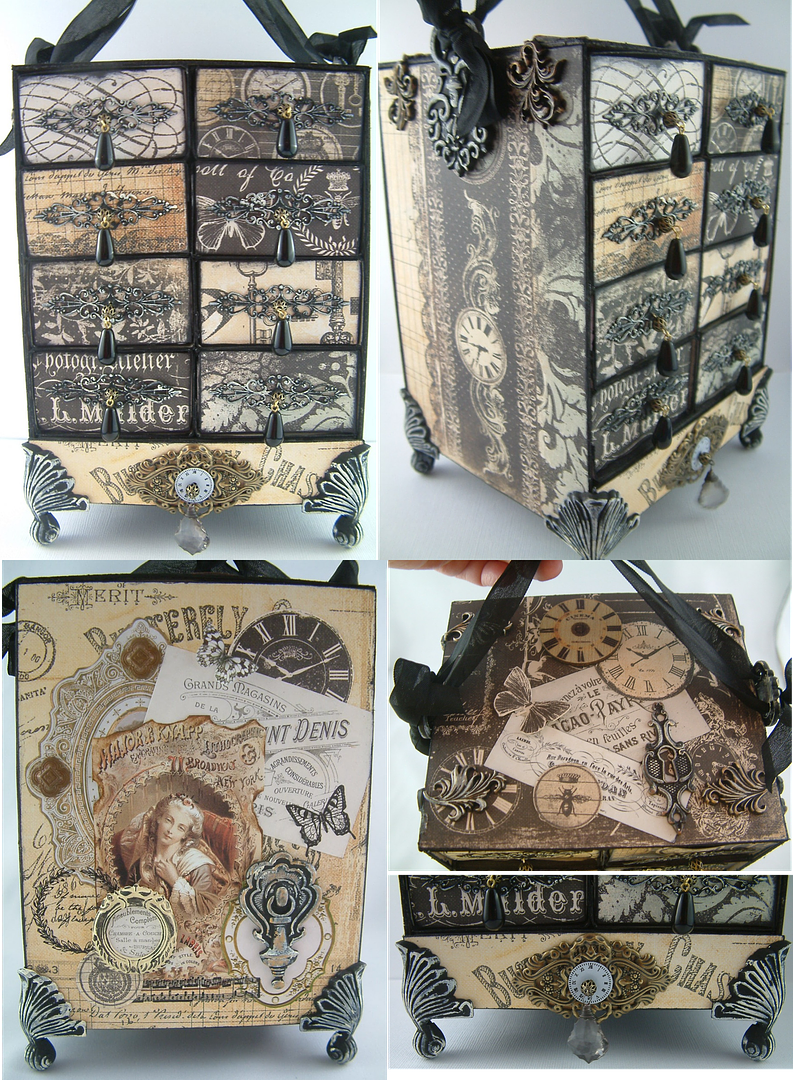
Large Version – Matchbox Chest
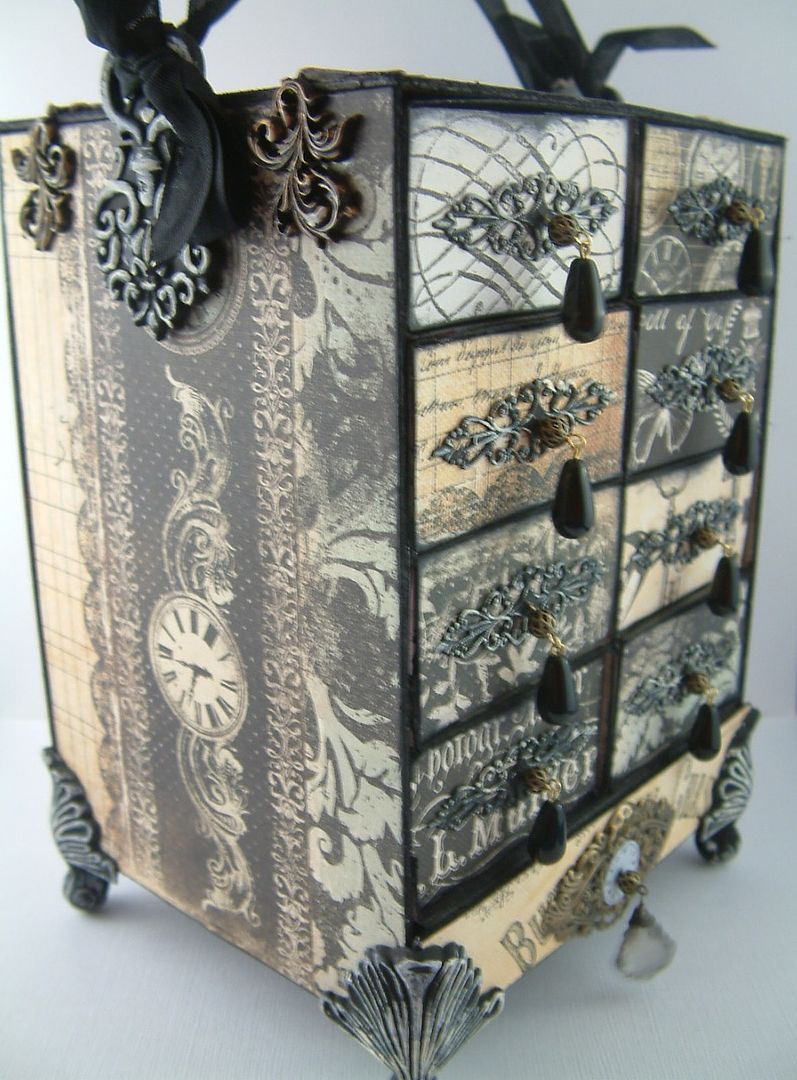
It’s really easy to scale the chest up in size.  This larger version of the chest is very similar the small version except that I used matchboxes that measure 4 ½” x 2 ½”.  This size of matchboxes is sometimes referred to a kitchen matches.  
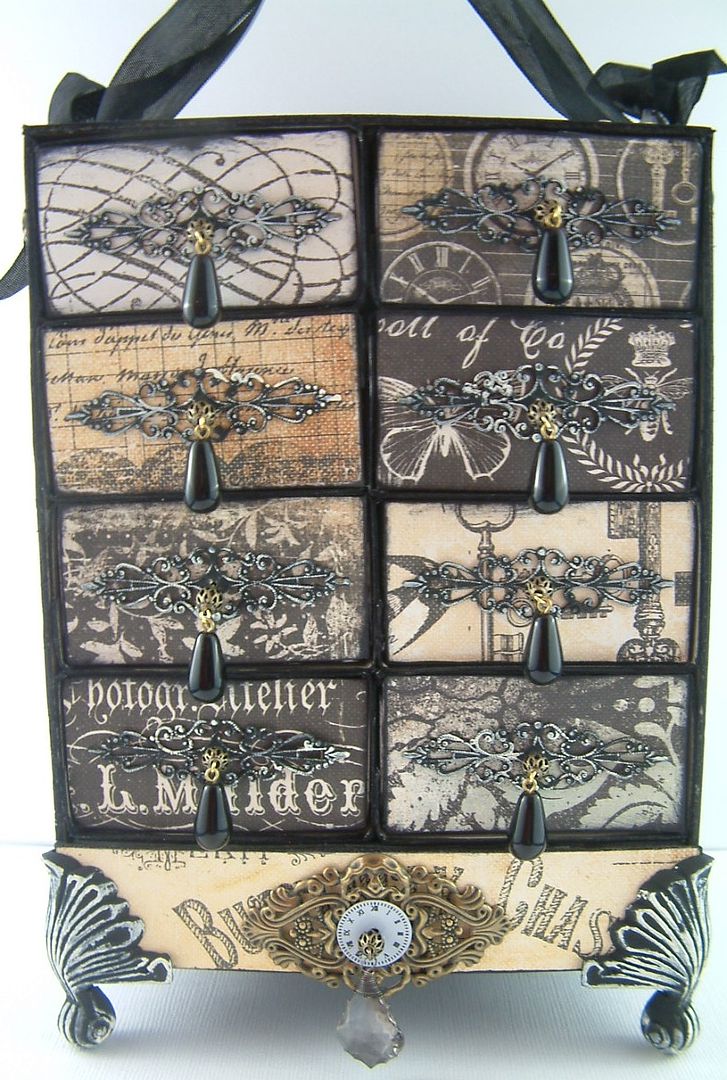
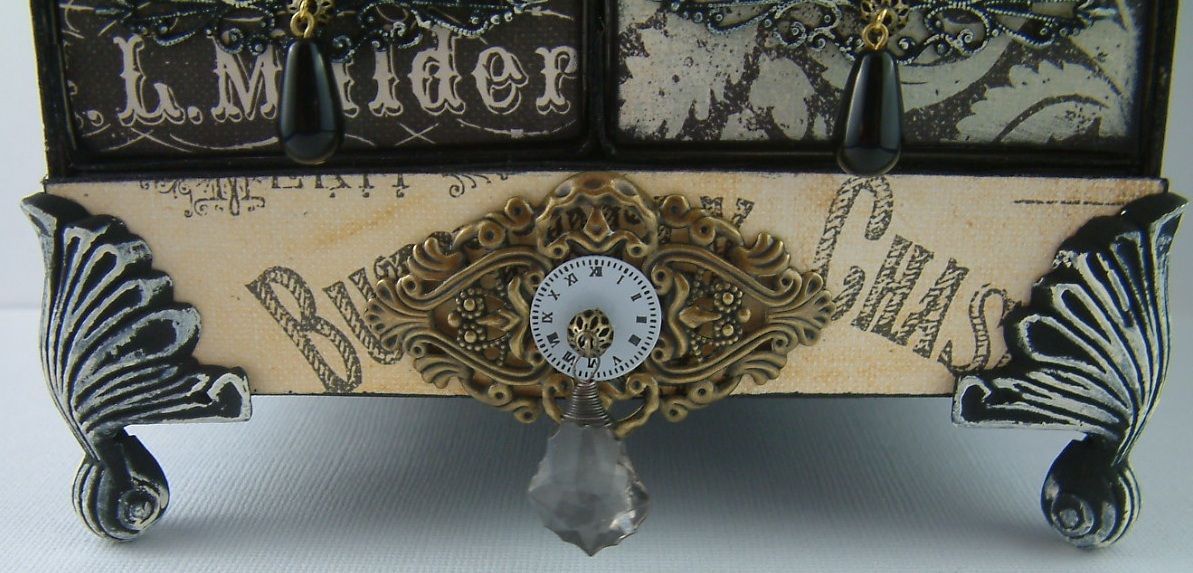
The base is larger than the one in the small version.  This is to accommodate the larger feet.  The feet I used are no longer available but Alpha Stamps carries feet that would work great for a chest this size and I think they are even prettier than what I used.
Instead of a metal handle I used ribbon.
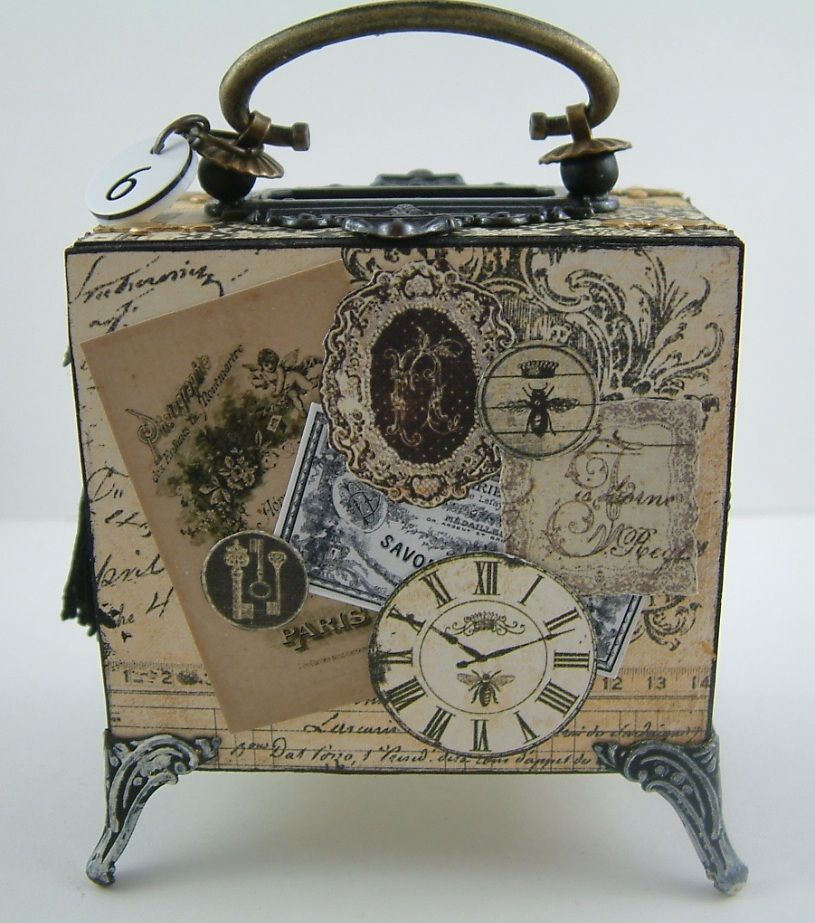
In honor of my matchbox chests and this tutorial,Alpha Stamps is offering two NEW Collage Sheets full of French ephemera.  I’ve used some of the images on the top and back of the chest.  One is the Vintage French Ads Collage Sheet and the other is the French Labels Collage Sheet (you can see the fabulous images on the sheets pictured below.)
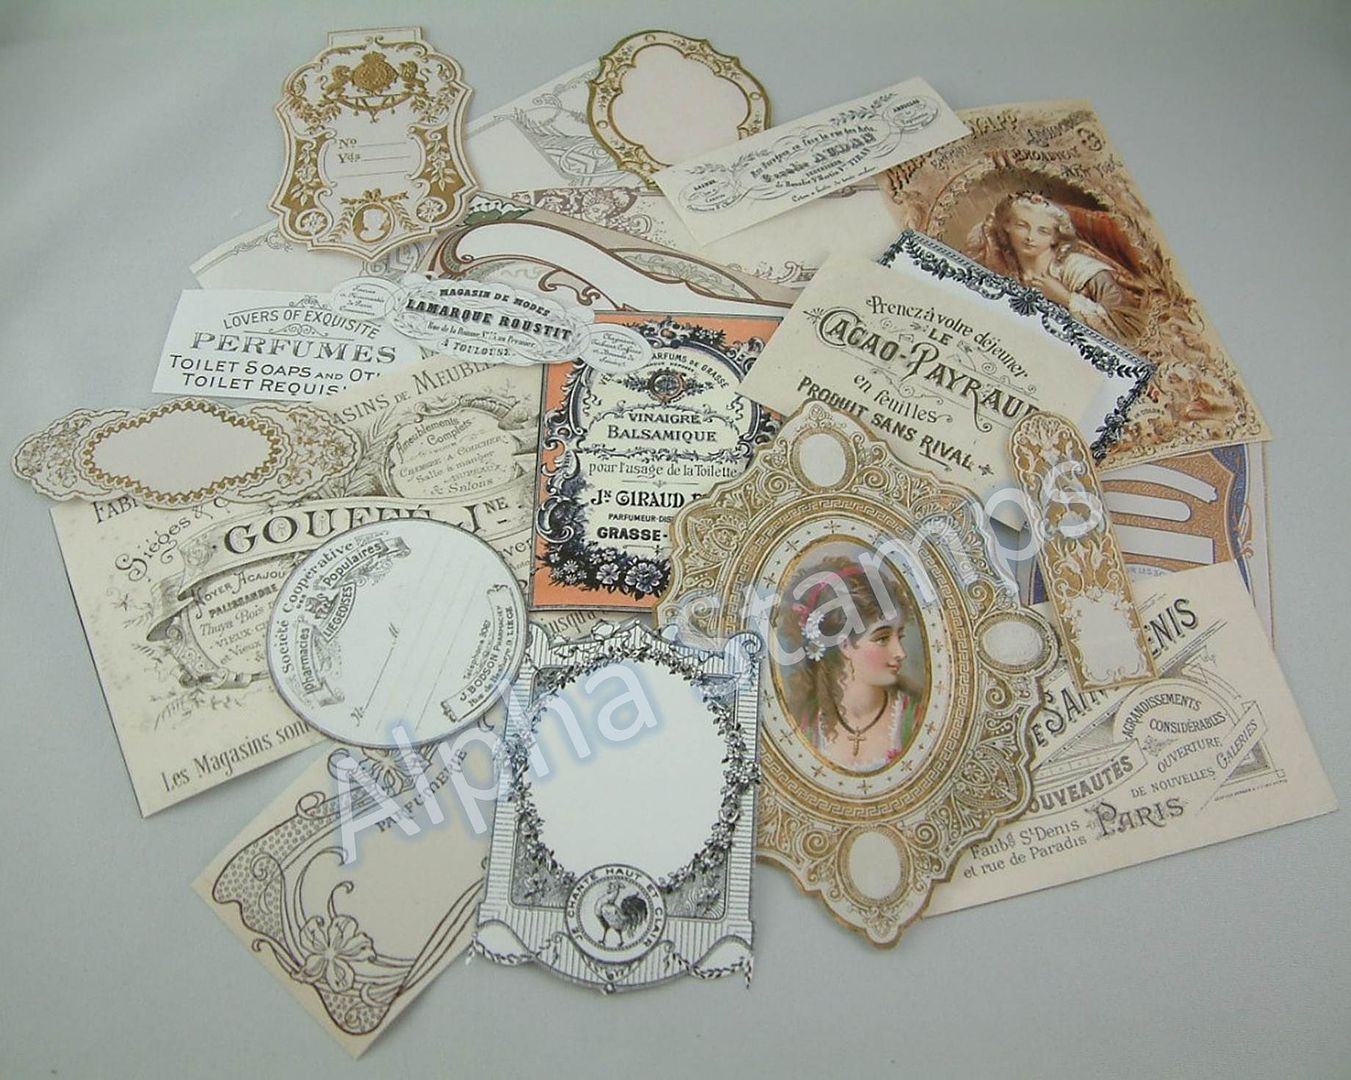
I’ve used some of the images from the new collage sheets on the top and back of the chest.
Products I Used That You Can Find At Alpha Stamps
Vanity Chest – Made with a Cigar Box Top
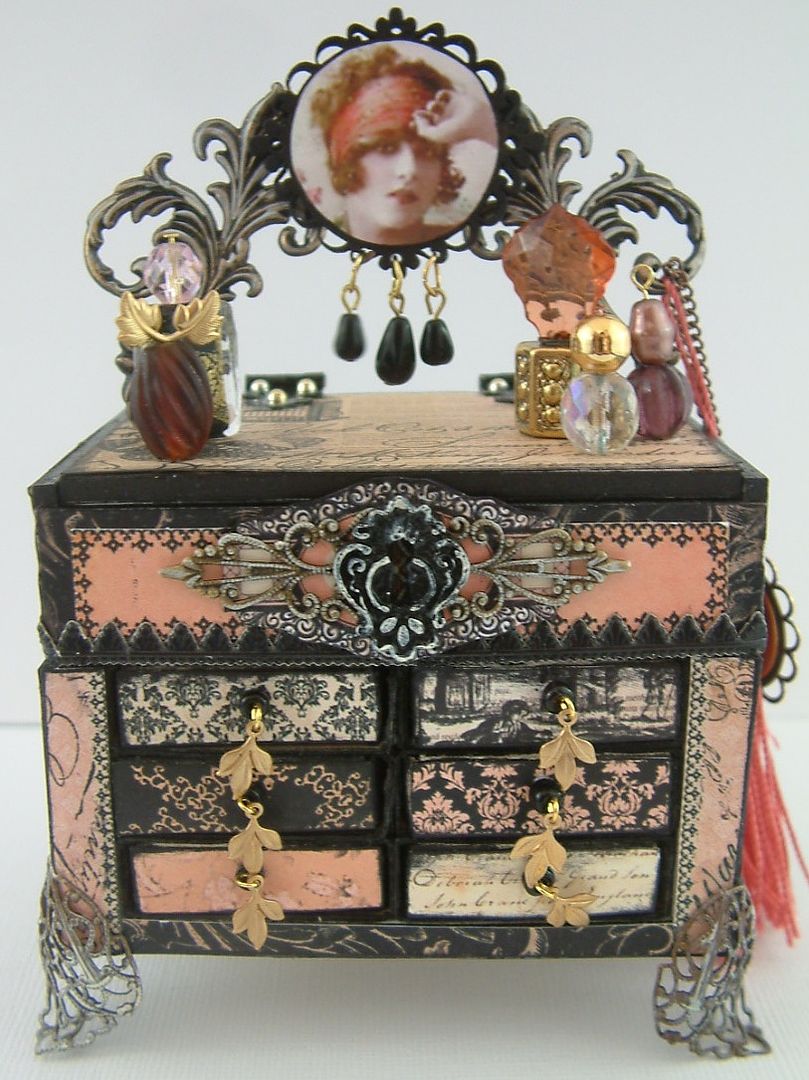
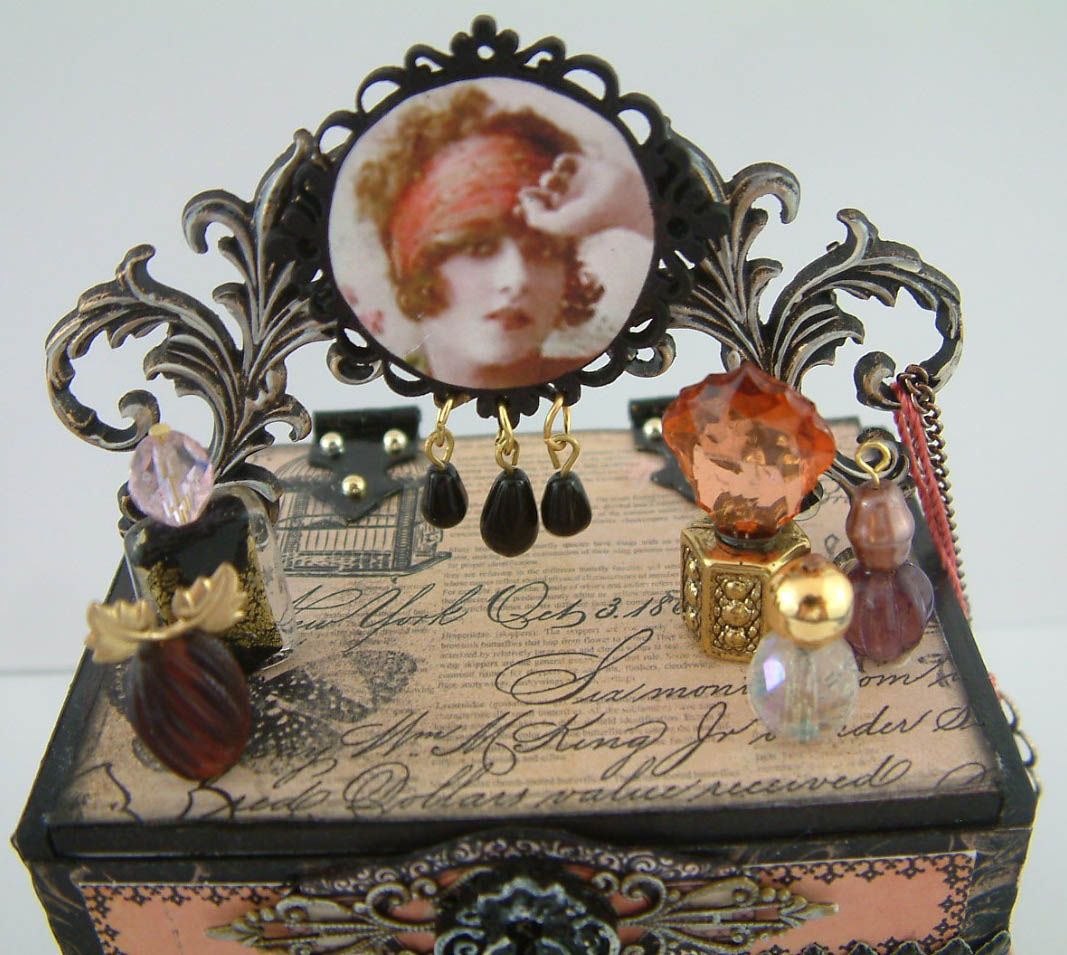
After creating the first chest I decided to build this version using a combination matchboxes and a tiny Masonite cigar box creating a hinged vanity.  The overall dimensions are 6” tall by 4” wide.
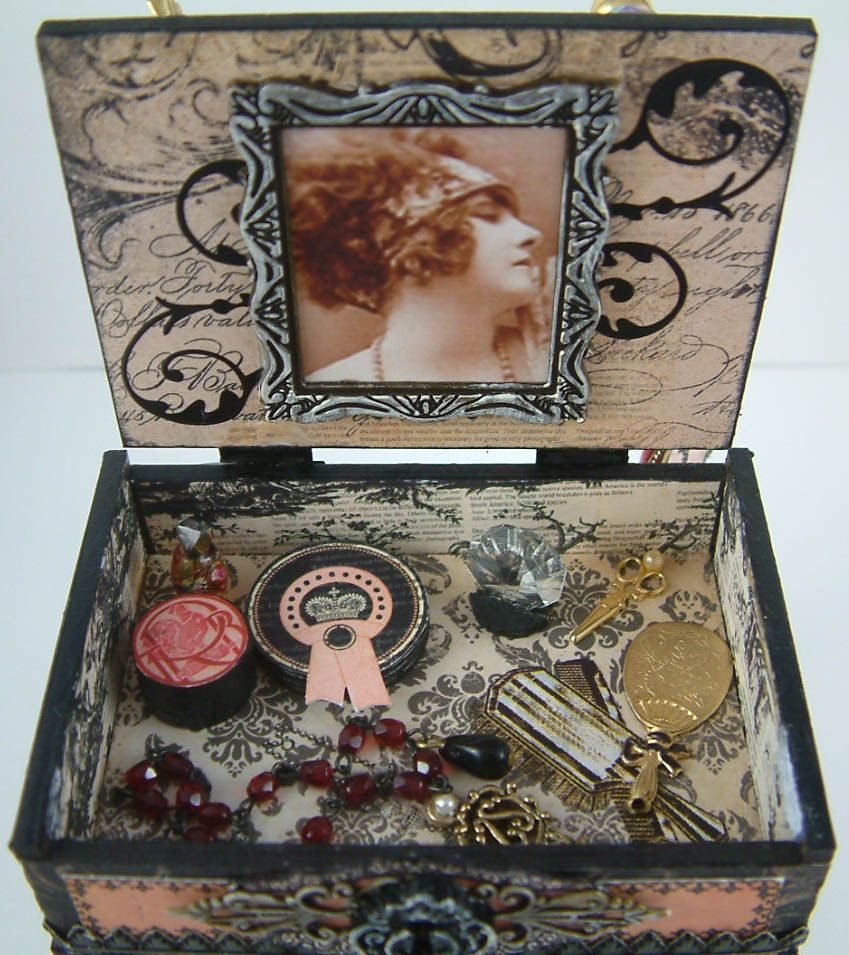
Inside the vanity you’ll find perfume bottles, powder boxes, brush and comb, a mirror, jewelry and a key to perhaps a secret diary.
Products I Used That You Can Find At Alpha Stamps
Mini Chandelier Crystals

I hope you have enjoyed this tutorial and have fun creating your own Matchbox Chest!!

Monday, February 17, 2014

Make Something New Out of Something Old ~ Display Shelves

Make Something New Out of Something Old
http://www.countryliving.com/crafts/projects/green-crafts


Claire Richardson
BackNext

Display Shelves

Glamorize an old wine crate or wooden box by adding shelves and a gilded frame. Finish with paint and it's ready for storing pretty toiletries or displaying an interesting collection.
Step 1: Remove the back of an old wine crate or wooden box.
Step 2: Make shelves to fit inside the box, then add a bit of glamour by fastening a gilded frame onto the front of the unit.
Step 3: For an antique finish, spray-paint with Krylon Crystal Color.
Step 4: Buy a picture-hanging kit that includes hooks that can be attached to the back of the shelves. Make sure they can hold at least 50 to 100 pounds.


Read more: Recycled Craft Ideas - Mason Jar and Recycled Crafts - Country Living 
Follow us: @countryliving on Twitter | CountryLiving on Facebook 
Visit us at CountryLiving.com

Sunday, February 16, 2014

Baked "Fried" Chicken

BAKED FRIED CHICKEN -


Baked *Fried* Chicken Recipe

239K+
My family is freaking out over this chicken recipe…
A family favorite, this baked chicken recipe, tastes fried, but isn't. No skin. No frying. Just super moist and flavorful! Move over KFC, I think you found your rival! Pin now, make later! Pin now, make later. Bakerette.com

They loved it. Mr. Chef adored it! He loved it so much he asked if I could make it again tomorrow! You gotta know something about Mr. Chef…when he finds something he likes, he wants to either go to the same restaurant week after week and get the same thing, or he wants me to make the same meal over and over again. He’s like on repeat mode and I can’t turn it off.
Okay, on to this recipe…how is it you can make incredible fried chicken without frying it in hot oil? The secret is in the sauce…using a SMALL amount of butter and BAKING the chicken. Oh boy, I can just hear some people saying ”well what’s the difference between using oil or using butter? One, I’m baking these babies in a SMALL amount of butter in comparison to the loads of oil you fry chicken in. Two, I’m using skinless chicken breast, making it even healthier. So, even though there is technically “oil” in this, it’s less than if you were actually frying it; making it healthier than the traditional fried chicken.
Now I’m sounding like a preacher. My kids tell me that I’m pretty good at preaching. Yep, I’m in practice for the ministry. I kind of like the idea of pounding my fist and talking hell, fire, and damnation. :)
Any-who…this chicken recipe has no skin. No frying. Just super moist and flavorful. Move over KFC, I think you found your match!
Pin now, make later!

Stay Up-To-Date With Bakerette

5.0 from 1 reviews
Baked *Fried* Chicken
 
Prep time
Cook time
Total time
 
Author: 
Recipe type: Poultry
Cuisine: American
Serves: 6
Ingredients
  • 6 boneless, skinless chicken breast cut into thirds
  • 1 cup all-purpose flour
  • 1/2 teaspoon salt
  • 1 tablespoon seasoned salt (I use Lawry’s Seasoned Salt)
  • 3/4 teaspoon pepper
  • 2 teaspoon paprika
  • 1/2 stick butter (or 1/4 cup)
  • Buttermilk
  • 1 gallon-size Ziploc bag (optional)
Instructions
  1. Place thawed chicken strips in a bowl of buttermilk, cover, and let soak 20-30 minutes in the refrigerator..
  2. Meanwhile, preheat oven to 400 degrees Fahrenheit.
  3. Combine and mix thoroughly flour, salt, seasoned salt, pepper, and Paprika in a gallon-size Ziploc bag or bowl.
  4. Cut 1/2 stick of butter into a few pieces and place in a 9- x 13-inch pan. Melt butter in preheated oven.
  5. Spread melted butter around the bottom of the pan. Lightly spray the pan with cooking spray, if needed, to make sure that there are no dry spots.
  6. Shake excess buttermilk off chicken and completely coat each piece in flour mixture. Either shake in the bag until coated or dip each piece in the bowl until coated.
  7. Place each piece of chicken in the preheated pan. Bake for 20 minutes. Turn each piece of chicken over and continue baking for 20 minutes more, or until cooked through (170 degrees F).
Recipe adpated from Amy Lindstrom's OurLifeUncommon.com

Friday, February 14, 2014

Secret Tempura Combo


Secret Tempura Combo

      
  • from Mr. Food.com
Secret Tempura Chicken
Watch Video
This recipe for Secret Tempura Combo may just put your favorite Asian restaurant out of business! And we love it because it also works with almost any type of vegetable (although firm ones work best).
Serves: 6
Cooking Time: 20 min
What You'll Need:
  • 1/2 cups pancake and biscuit baking mix
  • 1 teaspoon cayenne pepper
  • 1/2 teaspoon garlic powder
  • 1 teaspoon salt
  • 1/4 cups club soda
  • 1 pound boneless, skinless chicken breasts, cut into 1/2-inch strips
  • bunch broccoli, cut into florets
  • 1/2 pound whole fresh mushrooms
  • zucchini, cut into 1/2-inch chunks
  • 3 cups vegetable oil for deep-frying

What To Do:

  1. In a large bowl, combine baking mix, cayenne pepper, garlic powder, and salt. Add club soda; mix well. Add remaining ingredients except oil; stir to coat completely.
     
  2. In a soup pot over medium-high heat, heat oil just until hot. Place coated chicken and vegetables in hot oil one piece at a time. Cook 4 to 5 minutes, or until coating is golden brown. Remove with a slotted spoon and drain on paper towels. Continue until all are cooked, discarding any remaining batter.
     
  3. Serve immediately, or keep warm on a baking sheet in a low oven.
     
Notes
  • If the batter thickens, just add a little more club soda to get it to the proper consistency.
     

Read more at http://www.mrfood.com/Chicken/Secret-Tempura-Combo/ml/1/?utm_source=ppl-newsletter&utm_medium=email&utm_campaign=mrfooddaily20140121#t1dUlXME1Ho4ZulQ.99

Wednesday, February 12, 2014

DIY: PHOTO COLLAGE

DIY:  PHOTO COLLAGE

Wall Picture Collage


I have been wanting to hang something on the wall in my kitchen ever since we moved in.  Between Emily and I, we finally dreamed up this Wall Picture Collage after looking at lots of other people’s photo collages- and I love the way it turned out.
Here are all the things that I bought.
(all found at walmart)
This entire project was under $20. My kind of project!
*pictures you want to use (I had free prints from Costco)
* 2 20×30 foam core boards (I got two black ones $2.88 each)
*poster hanger thingies ($2.44)
*foam brushes ($.97)
*double sided tape ($3)
*mod podge (I already had some)
 This shows you how thick the foam core board is..
First I drew out a plan..
Then I cut some computer paper first, and made sure it would work before I cut up my pictures.
 Then I went to work cutting my 4×6 pictures into 4 inch squares.
 I then laid them all out on the floor in the order that I wanted them, and then taped them down with double sided tape.
 Then I took it in the kitchen and painted mod podge all over it.
 This is the scary part… cause it feels like you are about to ruin the pictures!
but don’t worry.. it does dry clear.
I had glossy mod podge that I’ve had since high school-
but I wish I would have used matte mod podge.
My dried collage glares a bit, and the old stuff was chunky.
I have since bought some matte stuff, but I don’t know if I dare go over everything with another coat.
I let it dry overnight..
and hung it up the next morning.
Here’s the view from the living room….
and straight on.
It’s not perfect, but I like it!

Tuesday, February 11, 2014

ARE YOU KIDDING CAKE

ARE YOU KIDDING  CAKE


The ARE YOU KIDDING cake

The person who posted this recipe claims she got it from an Amish woman, which means that you don’t need any fancy mixers to prepare it. So I sent my mother out to get the 3 ingredients and, curious to see if it would actually make something, she obliged. The 3 ingredients are:
  • 3 large eggs
  • 1 box cake mix (any flavor)
  • 1 can pie filling (any flavor)
photo (8)
I chose yellow cake mix and peach pie filling, but you can actually choose, for example, yellow cake mix and cherry pie filling and the cake will come out pink! Check it out:
You can also choose blueberry pie filling and the cake comes out blue or chocolate cake mix and the cake comes out, well, chocolate.
The recipe claims that the cake comes out so moist and so delicious that you don’t even need to frost it.
So, then, the recipe says you put the three ingredients into a bowl, mix them well, and bake for 35 minutes at 350 degrees. The whole thing from prep to clean-up took me 10 minutes. Pretty awesome if the cake comes out well.
When I took the cake out of the oven, it looked like this:
photo (9)
I let it cool and took myself a piece:
photo (10)
It’s freaking delicious! It’s got almost a pudding-cake kind of consistency, lighter than pound cake. It’s spotted on the inside with little pieces of peaches. The edges are crispy, like you would get on brownies.
Amazing. The cost of the ingredients is under $6 and the cook time from prep to clean-up can be as little as 10 minutes. Also, you can combine cake mix and pie filling flavors to make tons of different creative cakes. Some interesting cakes to try in the future:
  • Pineapple cake mix and blueberry filling
  • Chocolate cake mix and cherry filling
  • Yellow cake mix and cherry filling
  • Yellow cake mix and blueberry filling
  • Butter pecan cake mix and apple filling
  • Yellow cake mix and apple filling
  • Yellow cake mix and blackberry filling
  • Strawberry cake mix and blueberry filling

Monday, February 10, 2014

Reuse, Recycle Those Mason Jars Into a Liquid Soap Pump

Reuse, Recycle Those Mason Jars Into a Liquid Soap Pump
http://www.countryliving.com/crafts/projects


Pump Up a Plain Mason Jar

Repurpose the classic Mason jar as a soap or lotion dispenser in your bathroom.
Step 1: First, measure and mark the center of the jar's lid.
Step 2: Using a 1/2" high-speed steel drill bit (about $10; local hardware store), drill a hole to fit the width of a soap dispenser pump. We used pumps from old lotion bottles.
Step 3: Fill the jar with liquid soap, screw the lid back on, and insert the pump. You may need to trim the bottom of the pump to fit your j


Read more: Recycled Craft Ideas - Mason Jar and Recycled Crafts - Country Living 
Follow us: @countryliving on Twitter | CountryLiving on Facebook 
Visit us at CountryLiving.com