Wednesday, January 15, 2014

CRAFTY WEDNESDAY ~ Cleaning Seashells

CLEANING SEASHELLS
From:  http://allaexpression.com/blog/i-can-to-do-this-seashell-art-myself-artist-explanation-about-working-with-seashells/


Prejudice or wrong statement about seashell art.
Creating seashell art is a very simple craft at first glance. But in reality to make seashell art work is a very complicated, delicate and time consuming process which includes many steps!
  • Step1.   I’ve driven over 1 or 2 hours to the the best shelling spots in New York. After that all seashells are collected on the beach. I spend many hours combing the sand and shores for the perfect and sometimes unusual seashell fragments, sea glass and driftwood.
  • Step 2. Each seashell is hand rinsed in warm water and leaves on 24 hours in bleach for totally cleaning and smell removing. Sometimes I can put some shells in special solution with muriatic acid for 10-20 seconds at a time and after that rinse shells with water. The shells get very bright color. If you left in the muriatic acid for too long or not rinsed with soap water, the acid will continue to dissolve the shell. (How to restore seashell colors)

  • Step 3. I like to rub each shell after totally drying with Johnson’s baby oil or sometimes covers each shell with satin varnish for preserve natural color.
  • Step 4. I have to decide what canvas size or wood peace I like to use as a base for my work and what type of design theme I want to create. I can use various materials including some tiny pieces of natural stones, sea stars, corals or even gar scales for texture. I am always finding out different techniques and experimenting with new materials.
  • Step 5. Painting alone can take several days depending on the look I am trying to achieve. Sometimes I have to apply multiple coats to the background or to the shells. Usually I try to preserve natural seashell color and can use paints only in case for colorless and originally doll shells.
  • Step 6. After the background is ready I put out the seashells. It is not a simple step, a lot of thought and time I spend into which seashells fit best positions with each painting.
  • Step 7. Glue each shell on it position. If you prefer to use the multi purpose Elmer’s Glue, you have a chance and time to change your mind and improve any mistakes with seashell position. But try to avoid the extra glue amount! Glue can collect under the seashells causing them to slide, so each seashell needs to be pushed down to remove any not necessary glue amount. Glue also can leave marks on the painting!
  • Step 8. The Glue dries over a 24 hours period. After that I like to cover my seashell painting-mosaic with satin varnish for preserve natural color.
  • Step 9. I also screw in my own hanging wires so when a painting is purchased it is ready to hang. I title each painting-mosaic with names that I feel best represent the painting and what might have inspired me to create a particular piece.
  • Step 10. Pricing of my artwork depends on the time it took to make and the materials involved and rarity of seashells used. All of my paintings are originals and can be found no where else in the world. I might be able to recreate a similar painting but no two paintings or figurines will ever be exactly the same, because of unique seashells.
Share

Tuesday, January 14, 2014

Tuesday Tips ~ DIY Computer/TV Screen Cleaner

HOMEMADE COMPUTER/TV SCREEN CLEANER
FROM:  http://www.theprairiehomestead.com/2012/02/diy-computer-and-tv-screen-cleaner.html


Homemade Computer/TV Screen Cleaner
  • 1 part plain white vinegar
  • 1 part distilled water (make sure you use distilled only!)
  • A clean, lint-free cloth. (I like using old, worn-out t-shirts from my rag collection)
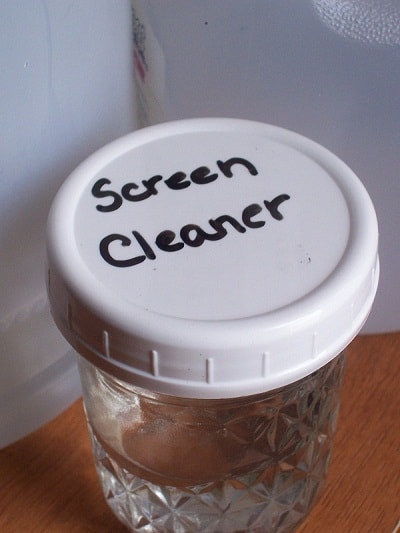
Mix the vinegar and water. Store in a labeled container (I use an small canning jar). A spray bottle would also work.
When you are ready to clean your screens, spray a soft, lint-free cloth with the solution, OR dip the cloth into the jar.
DO NOT spray the solution directly on your screen, as it can drip down into places it shouldn’t go.
Gently, wipe the screen with the damp cloth. It may take more than oneapplication, depending on how dirty things are.
Enjoy your shiny clean screen for as long as you can before the flies land on it again or the kiddos attempt more finger art.

Homemade Laptop Cleaner

A Few Notes:

  1. A 1/2 cup of vinegar and a 1/2 cup of distilled water is a good amount to start with.
  2. You can store this as long as you need to.
  3. Why distilled water? Distilled water is free from minerals which leave smudgy water spots on your screens. If you wash your screens with tap water, you’ll probably end up with a dirtier screen than what you started with.
  4. I use this on our flat screen TV and my laptop. I’ve had no trouble with it. However, please use it at your own risk with your own equipment.
  5. If you have a black kitchen appliances (like me), this solution is a great way to shine them up. (Because of our hard water, wiping things down with regular soapy water leaves lots of spots).
Enjoy those sparkly screens! ;)

Monday, January 13, 2014

Monday Solutions ~ A Prettier and Neater Laundry Room

MONDAY SOLUTIONS ~ A PRETTIER AND NEATER LAUNDRY ROOM 

from Pinterest @:  http://www.pinterest.com/pin/317081629986027945/
and                       www.viewalongtheway.com

.

And today, it looks like this:
Laundry room makeover for only $157! Painted floors, stenciled walls... come see how it was done!
39K+
Before and After

Saturday, January 11, 2014

Biggest Loser Recipes Oatmeal Pancakes

OATMEAL PANCAKES

Once you try these, you will never go back.-tastes like French toast!

Ingredients:

6 egg whites
1 cup rolled oats, dry
1 cup cottage cheese
2 teaspoons sugar
1 teaspoon cinnamon
1 teaspoon vanilla 


Instructions:

In a blender, blend all ingredients until smooth. Heat a griddle or large non-stick skillet over medium-low heat. Spray with non-stick cooking spray. For each pancake pour 1/4 cup of batter onto griddle. Flip when they start to bubble. Cook until golden brown. Repeat with remaining batches, spraying the griddle as needed. Makes about 10 pancakes.

Number of Servings: 3

Nutritional Info Per Serving:
181 Calories, 2.7g Fat, 10mg Cholesterol, 361mg Sodium, 20g Carbs, 2.8g Fiber

Friday, January 10, 2014

Top Pins of Pinterest 2013 ~ Tasty Recipes Philly Cheesesteak Stuffed Peppers

Philly Cheesesteak Stuffed Peppers - Low Carb, Gluten Free

http://www.peaceloveandlowcarb.com/2012/06/philly-cheesesteak-stuffed-peppers.html#.UOYt56Ui_a4


PHILLY CHEESESTEAK STUFFED PEPPERS
I'm not going to lie, as soon as this idea came to me, I felt like a culinary genius. If you can't tell by now, I like finding creative vessels for my dishes.  I have had a lot of fun with avocados with this same concept.  These peppers are great for lunch, dinner or even as an appetizer.  I hope you enjoy them as much as we have.


CLICK HERE TO FOLLOW ME ON FACEBOOK

INGREDIENTS
8 oz. Thinly Sliced Roast Beef
8 Slices Provolone Cheese
2 Large Green Bell Peppers
1 Medium Sweet Onion – Sliced
6 oz. Baby Bella Mushrooms - Sliced
2 Tbs. Butter
2 Tbs. Olive Oil
1 Tbs. Garlic - Minced
Salt and Pepper - to taste
(2 Tbs. Peace and Love)

DIRECTIONS
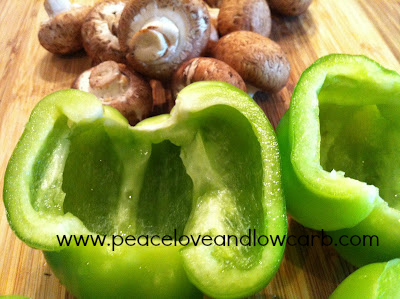
Slice peppers in half lengthwise, remove ribs and seeds.

In a large sauté pan over low-medium heat, add butter, olive oil, garlic, mushrooms onions and a little salt and pepper.  Sauté until onions and mushroom are nice and caramelized.  About 30 minutes.

Preheat oven to 400°

Slice roast beef into thin strips and add to the onion/mushroom mixture.  Allow to cook 5-10 minutes.

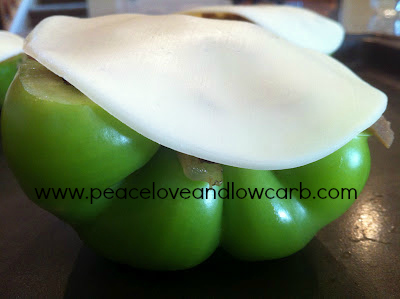
Line the inside of each pepper with a slice of provolone cheese.  Fill each pepper with meat mixture until they are nearly overflowing.  Top each pepper with another slice of provolone cheese.

Bake for 15-20 minutes until the cheese on top is golden brown. 


Prep Time – 15 Minutes
Cook Time – 50 Minutes

Makes Servings: 4
Per Serving: 
Calories – 458
Protein – 27 g
Carbs – 8.5 net g

Thursday, January 9, 2014

MAKE YOUR OWN BLUEBERRY SYRUP

MAKE YOUR OWN BLUEBERRY SYRUP
http://www.kitchendaily.com/read/9-diy-foodie-gifts-practically-make-themselves

9 DIY Foodie Gifts That Practically Make Themselves

BLUEBERRY SYRUP
Prep and Cook Time: 15 minutes
Ingredients: 1 cup blueberries; 1 cup maple syrup
Preparation: To prepare blueberry syrup, combine maple syrup and 1 cup blueberries in heavy medium saucepan over medium heat for 10 minutes

Wednesday, January 8, 2014

DIY Bean Chili Mason Jar Gift Basket

DIY BEAN CHILI MASON JAR GIFT BASKET
http://www.kitchendaily.com/read/9-diy-foodie-gifts-practically-make-themselves

9 DIY Foodie Gifts That Practically Make Themselves

BEAN CHILI MASON JAR GIFT BASKET
Prep time: 10 minutes
Ingredients: 3/4 cup great northern white beans; 1/2 cup split green peas; 3/4 cup black beans; 2 cans (14.5 oz. ea) fire roasted tomatoes, diced; 1 cup red kidney beans; 1/2 cup red lentils; 1/2 cup pinto beans; 10 chicken bouillon cubes; 1 3/4 cups dried Shitake mushrooms; 1/4 cup dehydrated onion, minced; 1 teaspoon black pepper; 2 1/2 teaspoons dehydrated parsley; 1 teaspoon dehydrated garlic, minced; 1 loaf baguette; 3 ounces Parmesan cheese.
Gift Basket Preparation: In a 6 cup glass mason jar, carefully add beans in layers starting with red kidney beans and ending with pinto beans. Place unwrapped bouillon cubes on pinto beans and cover with dried mushrooms. Close lid and secure over mushrooms. In a clear bag or sachet, layer black pepper, parsley and minced onion. Secure bag to jar with ribbon. Arrange in a gift basket with two cans of diced tomatoes, a baguette, a wedge of Parmesan cheese, and a recipe card (see below).   
Bean Chili Recipe Card: Remove dehydrated mushrooms and bouillon cubes from top of jar. Empty all of the beans, peas and lentils into a large cooking pot and cover with water to a level 2 inches over the beans. Bring to a boil for 2 minutes. Remove from heat, skim and discard foam. Set aside for 2 to 3 hours. Once beans have hydrated and softened, drain and rinse them. Add 10 cups of water, bouillon cubes, seasonings, mushrooms and tomatoes. Bring to a boil and simmer for 1 to 2 hours until beans are tender. Adjust seasoning with additional salt if desired. Split the baguette, shred the cheese. Cover baguette halves with cheese, melt cheese on the baguette in a hot oven and serve with remaining cheese to garnish chili.